Arabic Billing Software
Create VAT compliant bills in Arabic.
العربية الفواتير البرمجيات
Arabic billing software for creating VAT compliant bills. You can issue bilingual Arabic-English bills and track your VAT liability easily. Perfect billing software for businesses in middle-east. Easier than word/excel. Take a quick look.
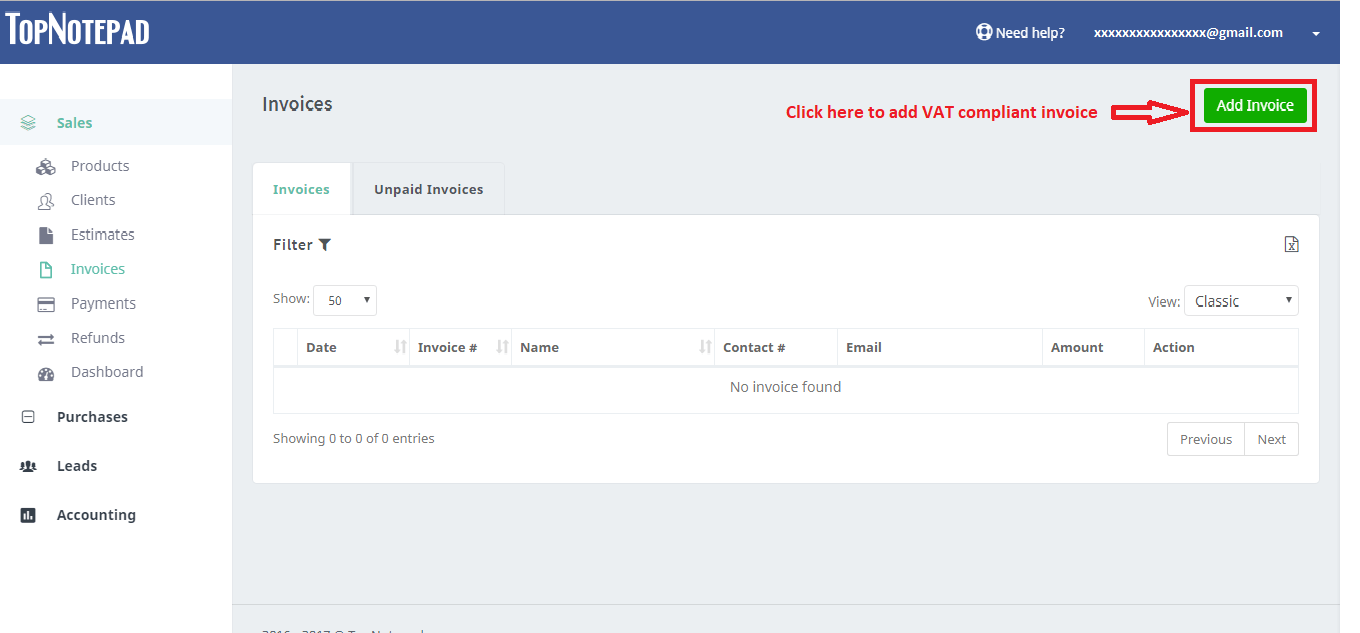
Step 1: To create an Invoice click on the add invoice button as shown in the screenshot below.

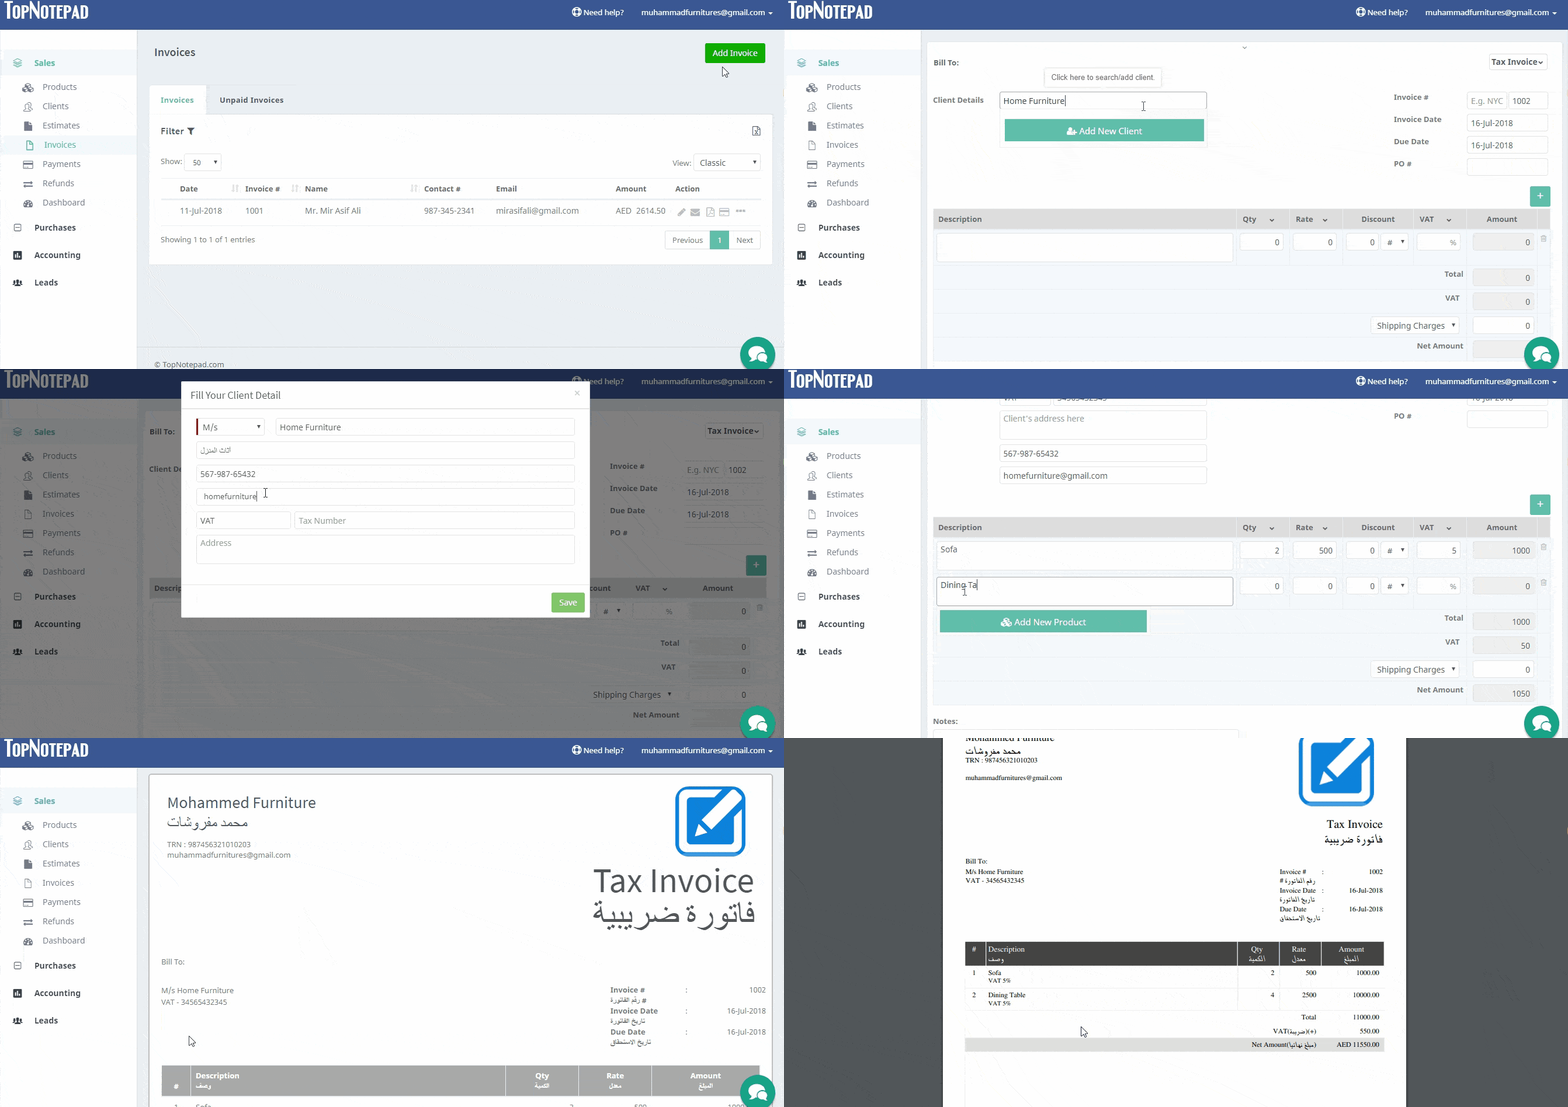
An Invoice form will open-up with different formats, select the suitable format and fill the necessary information as shown in the following steps.
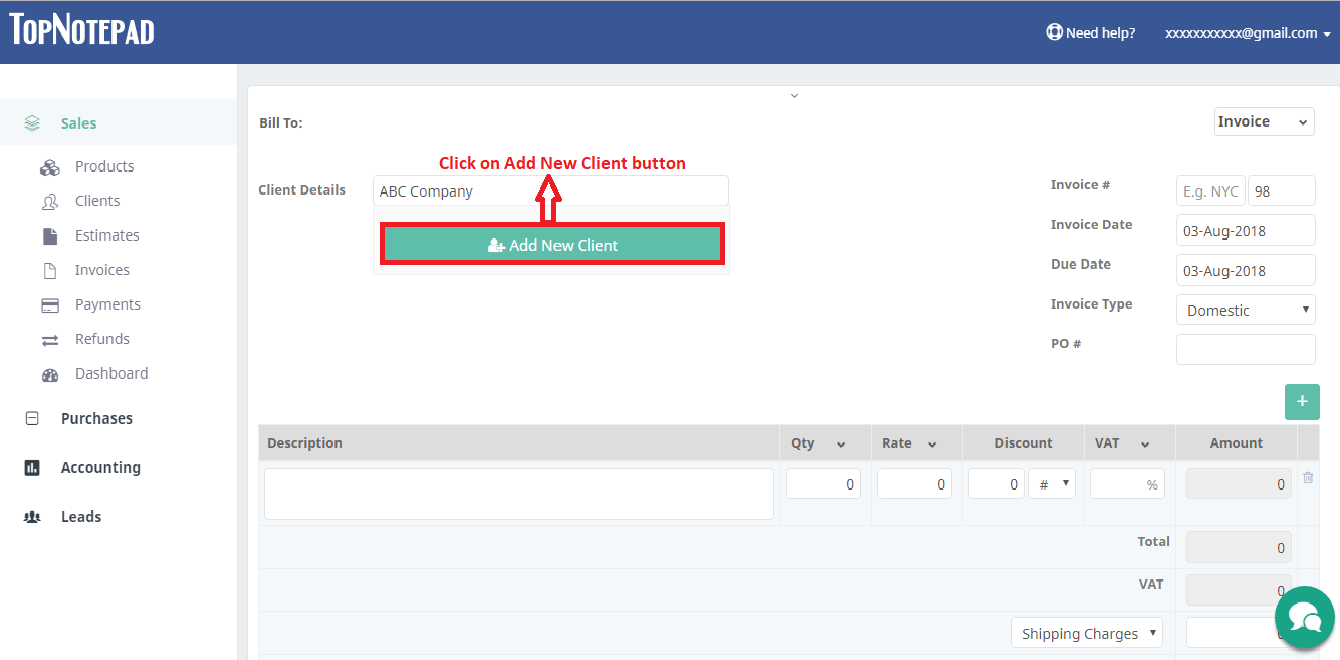
Step 2: : If you are invoicing a new client click on the add client button and if you are invoicing an existing client, type the clients name and select from the suggestion list.

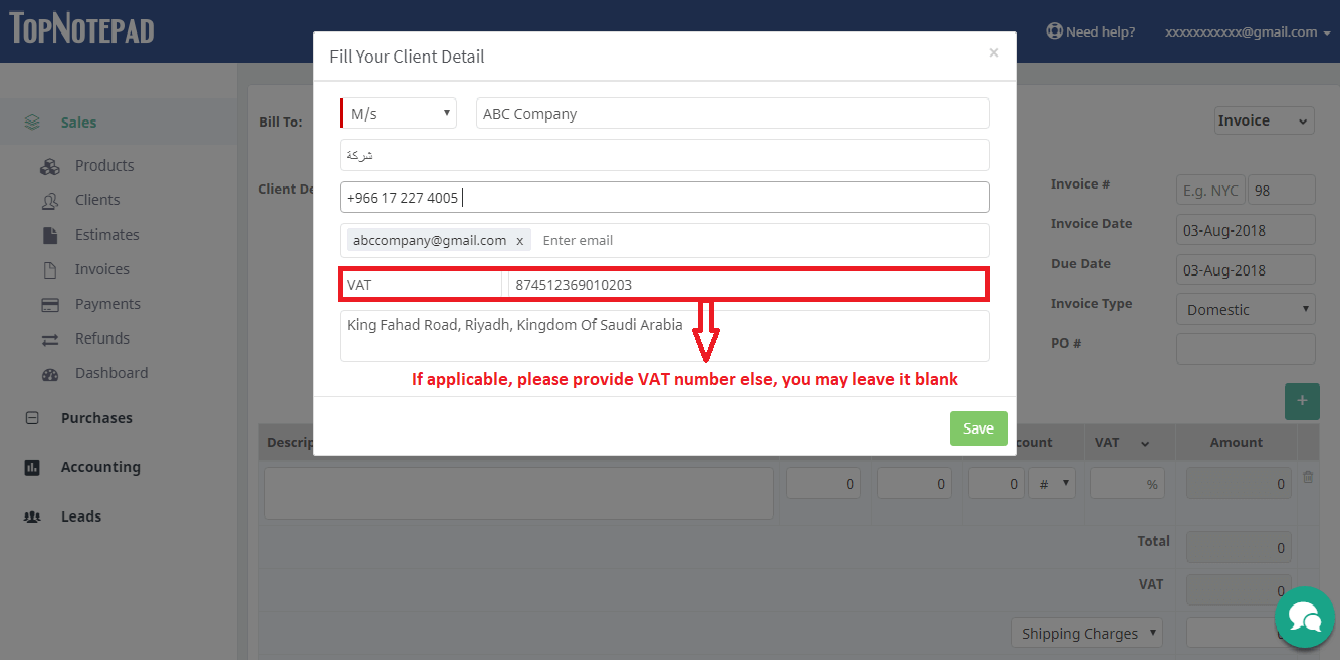
Step 3: : If you are invoicing a new client as noted above please click on the “add client” button, this action will pop-out a client details form. Please fill out the details like client name, client TRN number (if applicable), address etc., and click on “Save” button.

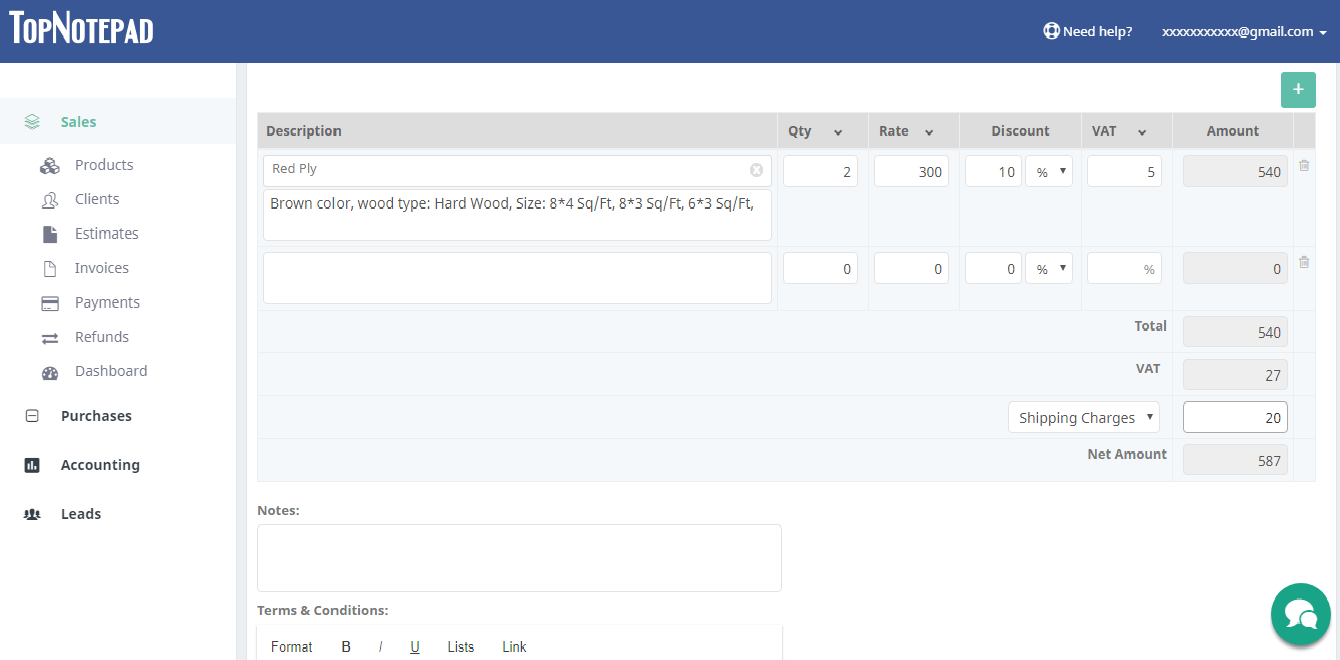
Step 4: Fill out the required information for creating the invoice as shown below. Provide information of product or service in the description section. In case you are selling a product, you may add the product by clicking on “add product” button, which appears when you start typing in the description section (this is optional though) and if it’s a customized service, you may just type the details.

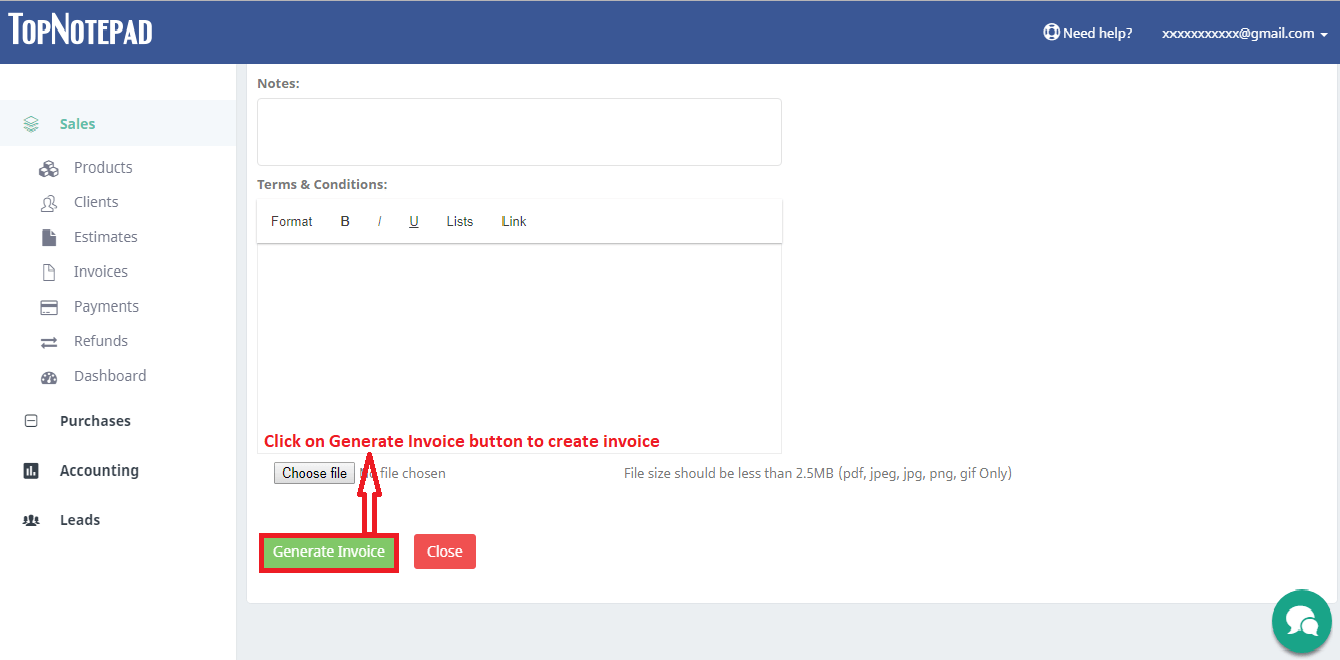
Step 5: Click on "Generate Invoice" button to create VAT compliant invoice after providing all the required information. Please take note, you have option to add specific notes and also terms and conditions, if any, related to the invoice.

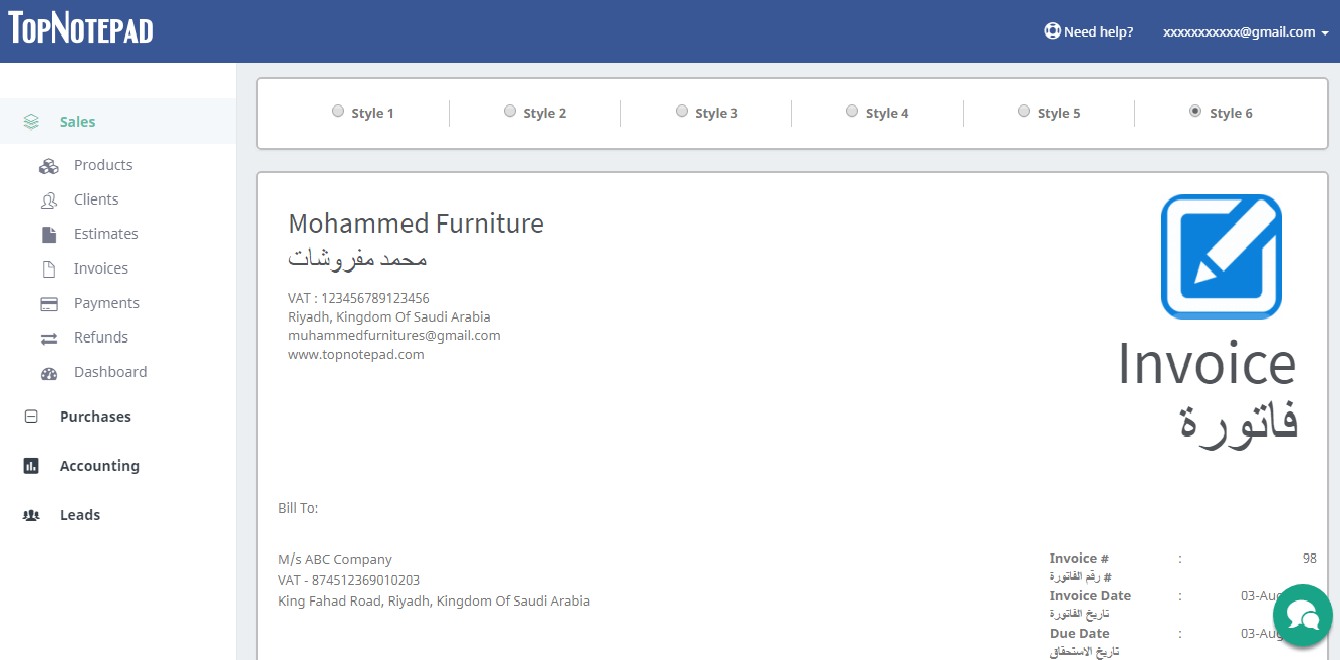
Step 6: That’s it! Your invoice is ready. You can now choose from the available styles. These styles present the same invoice in a few different ways. You can choose the style, you like the most.

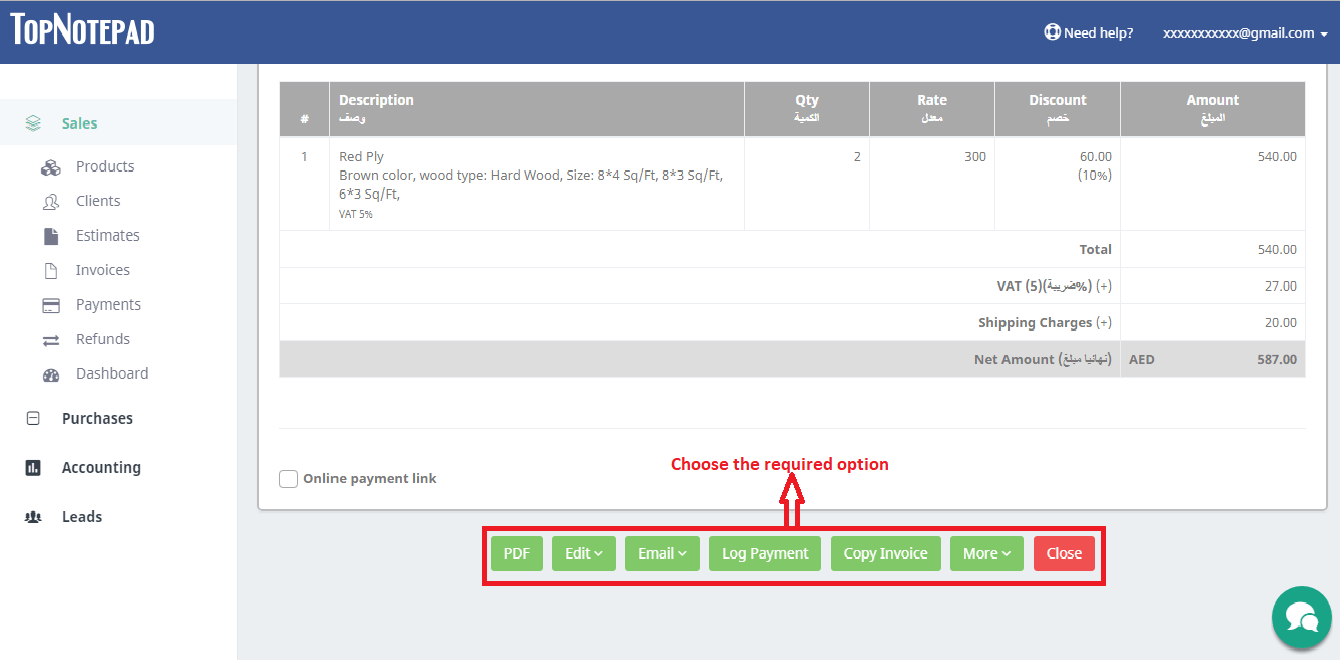
Step 7: Down, below the invoice. You will see quite a few options like PDF, you can click on it to generate the PDF version on the invoice, which can be printed. The other options include edit, email etc., you may explore all of them.

Go back to the list of all tutorials
Step 1: To create an Invoice click on the add invoice button as shown in the screenshot below.
Step 2: : If you are invoicing a new client click on the add client button and if you are invoicing an existing client, type the clients name and select from the suggestion list.
