Customizing email content
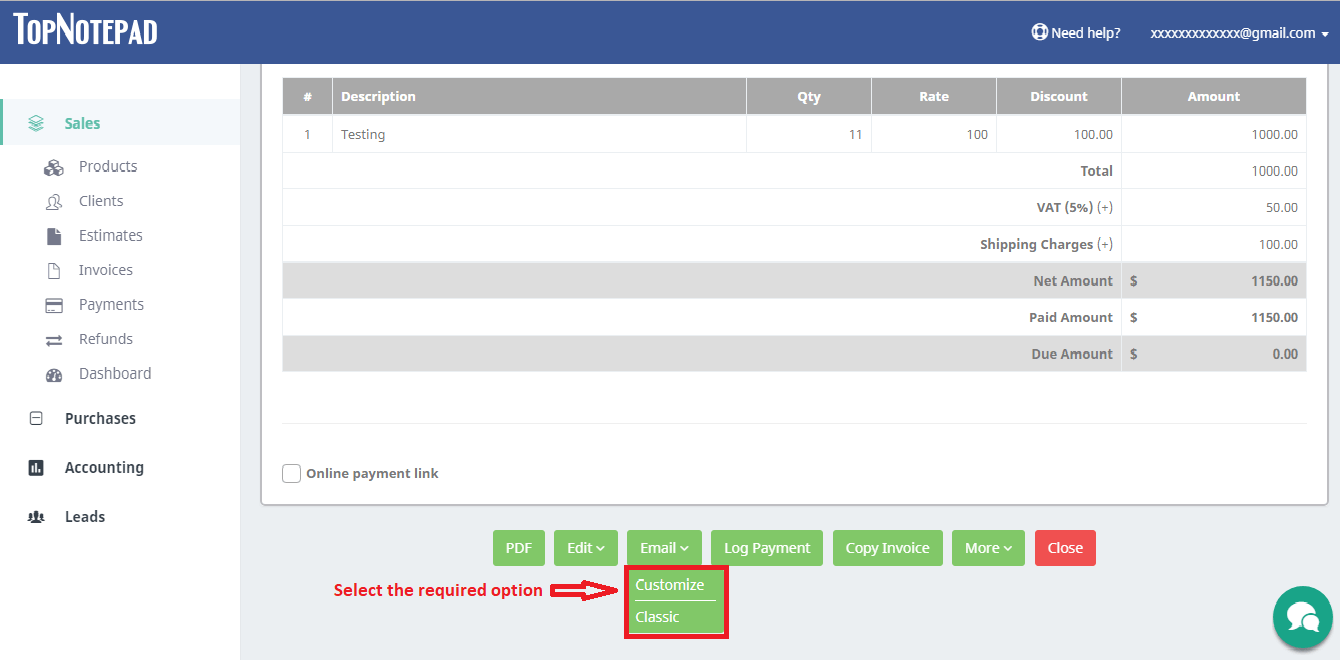
Step 1: After generating the invoice, mouse over to the “Email” button. Click on the “Customize” email option from the drop down.

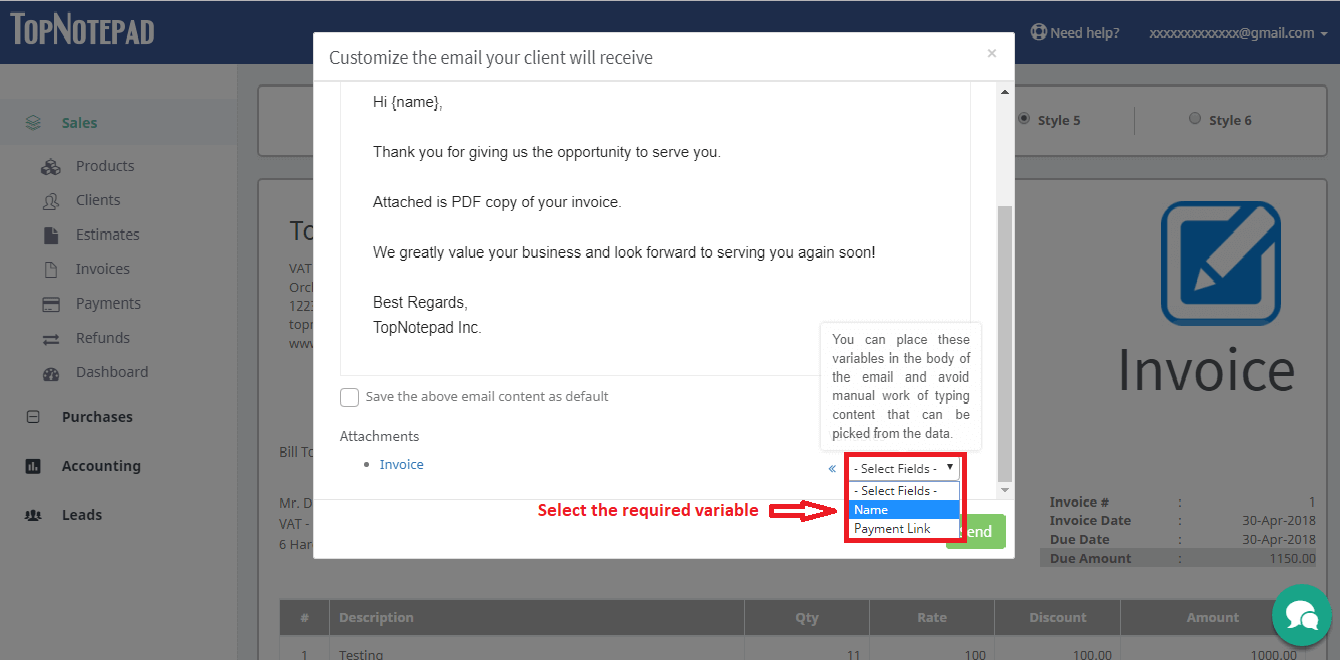
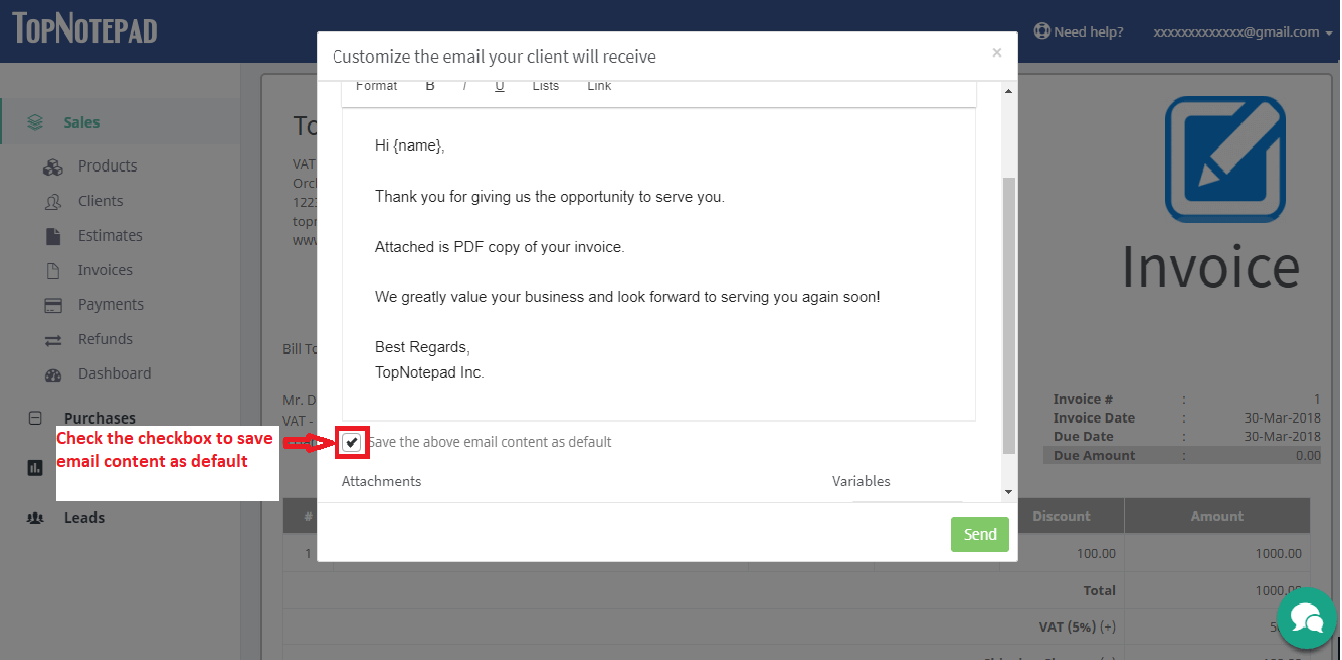
Step 2: A pop-up with option to customize email opens-up. You can modify the contents of the email here. It lets you change the subject and email body. You can also insert variables such as client name, payment link.
Step 3: It is easy to insert a variable. Just click on the arrow icon to pull the variable into the email body.
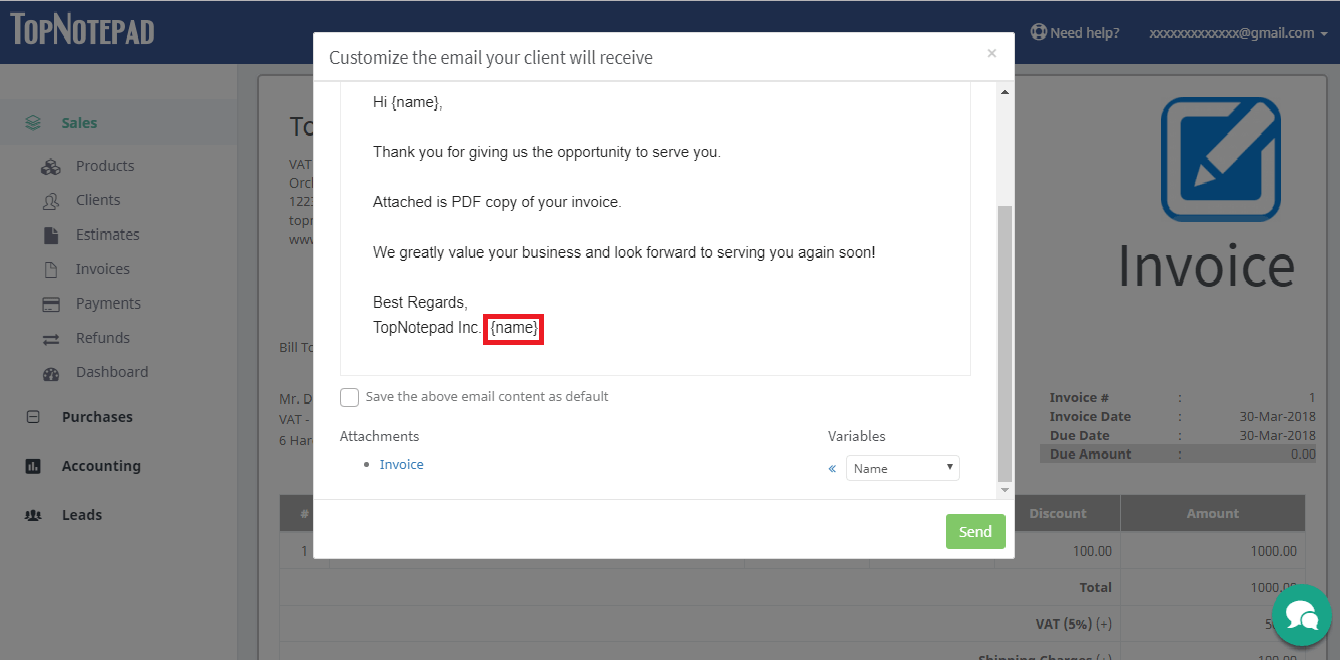
Step 4: You can cut/copy and paste the variable anywhere in the email body.
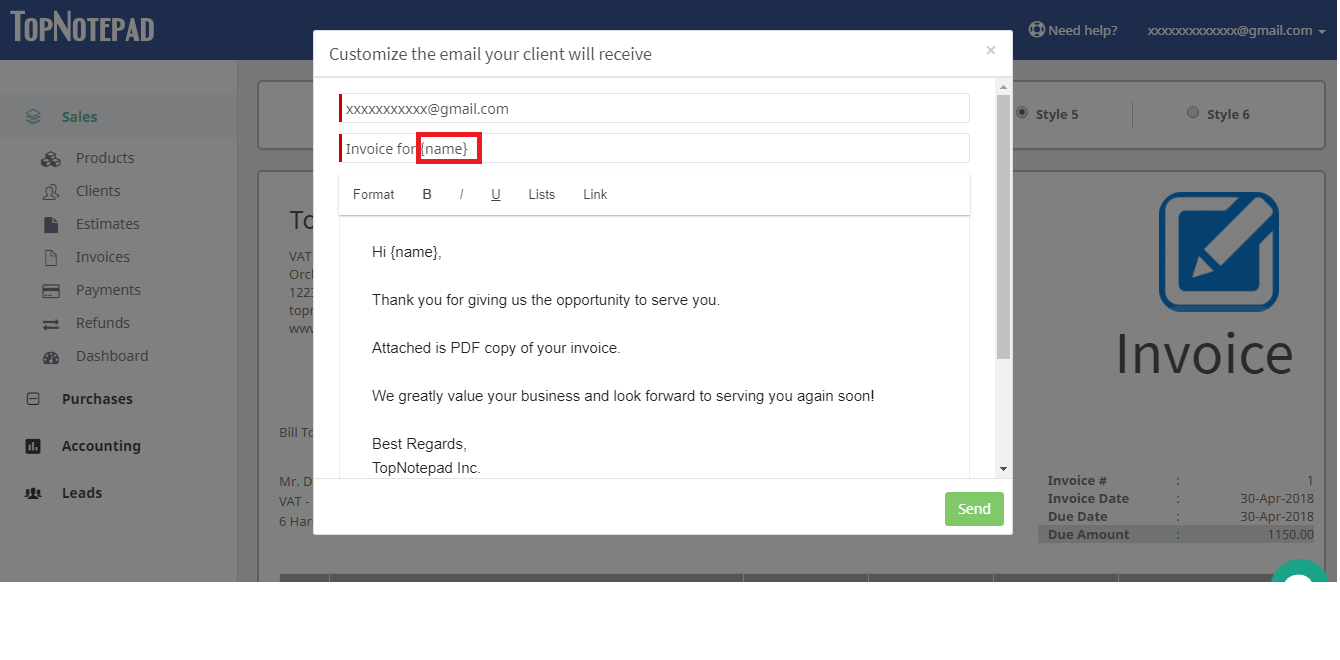
Step 5: You can place the variable in subject as well.
Step 6: Check the box to save the email template for future

Go back to the list of all tutorials
Step 2: A pop-up with option to customize email opens-up. You can modify the contents of the email here. It lets you change the subject and email body. You can also insert variables such as client name, payment link.
Step 3: It is easy to insert a variable. Just click on the arrow icon to pull the variable into the email body.
Step 4: You can cut/copy and paste the variable anywhere in the email body.
Step 5: You can place the variable in subject as well.
Step 6: Check the box to save the email template for future
Go back to the list of all tutorials