Steps to link Invoice and Expense
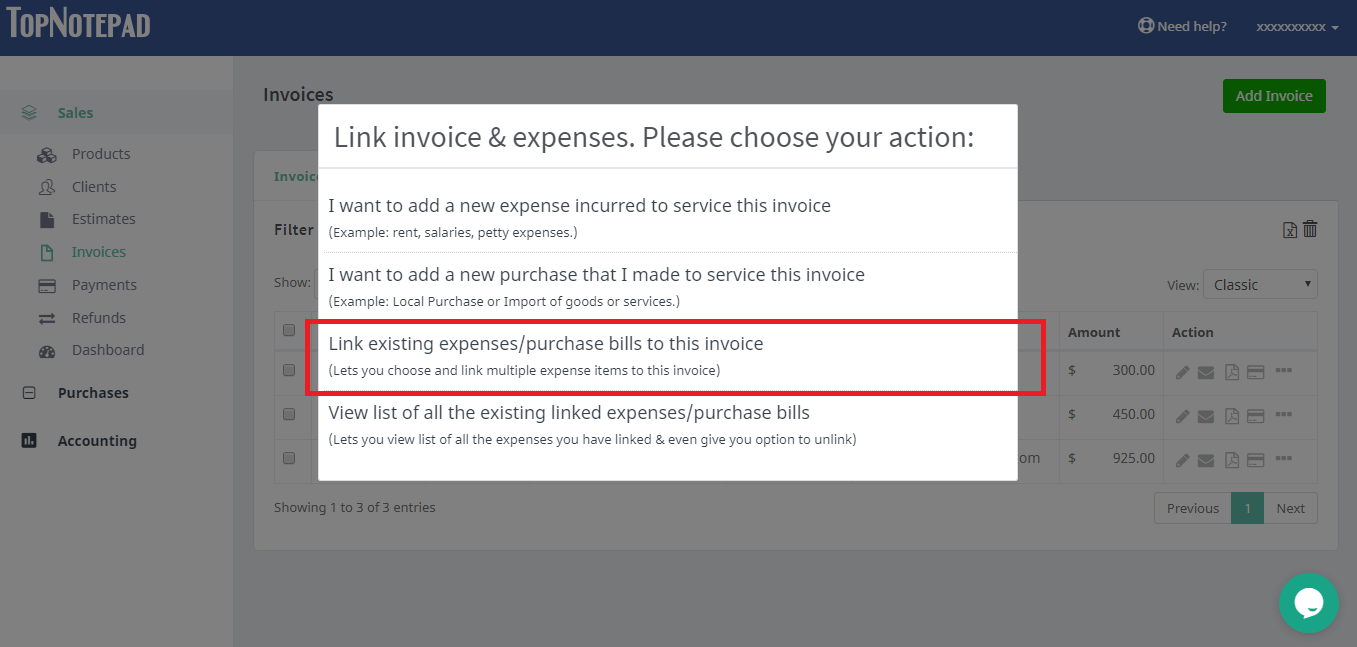
Step 1: Mouse over to the last action icon, this will open up a few more icons. Choose the last icon from the extended list of icons you see. Click on the action icon as shown below to accomplish any of the following:
Option 1: Record a new expense/purchase bill or against an Invoice as shown in the screenshot below.
Option 2: To link an existing expense or purchase bill or against an Invoice as shown in the screenshot below.
Option 3: To view already linked expenses and purchase bills against an Invoice as shown in the screenshot below.

Step 2: In this tutorial, we will look at option 3 i.e., linking existing expense against an invoice, you can explore the others.
To link existing expenses please choose the third option i.e., "Link existing expenses/purchase bills to this invoice".

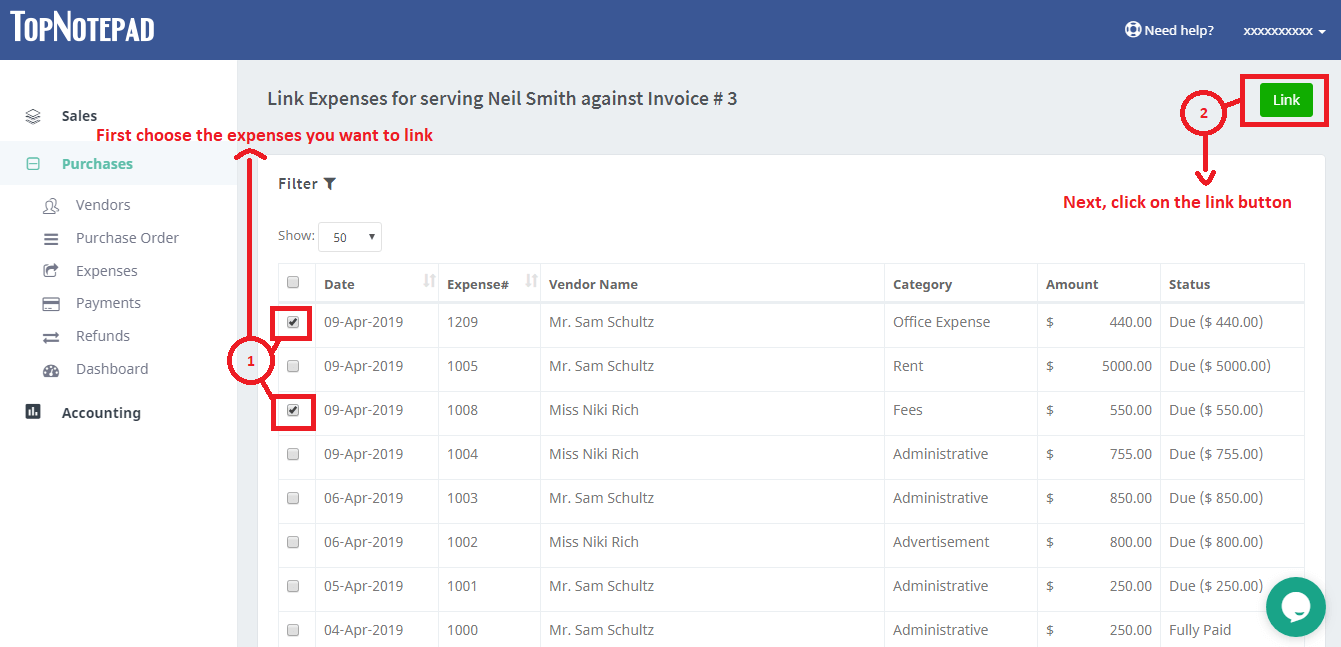
Step 3: As shown in the screen-shot below, choose the expense records you want to link to the invoice by checking the box and then click on the "Link" button on the top right.

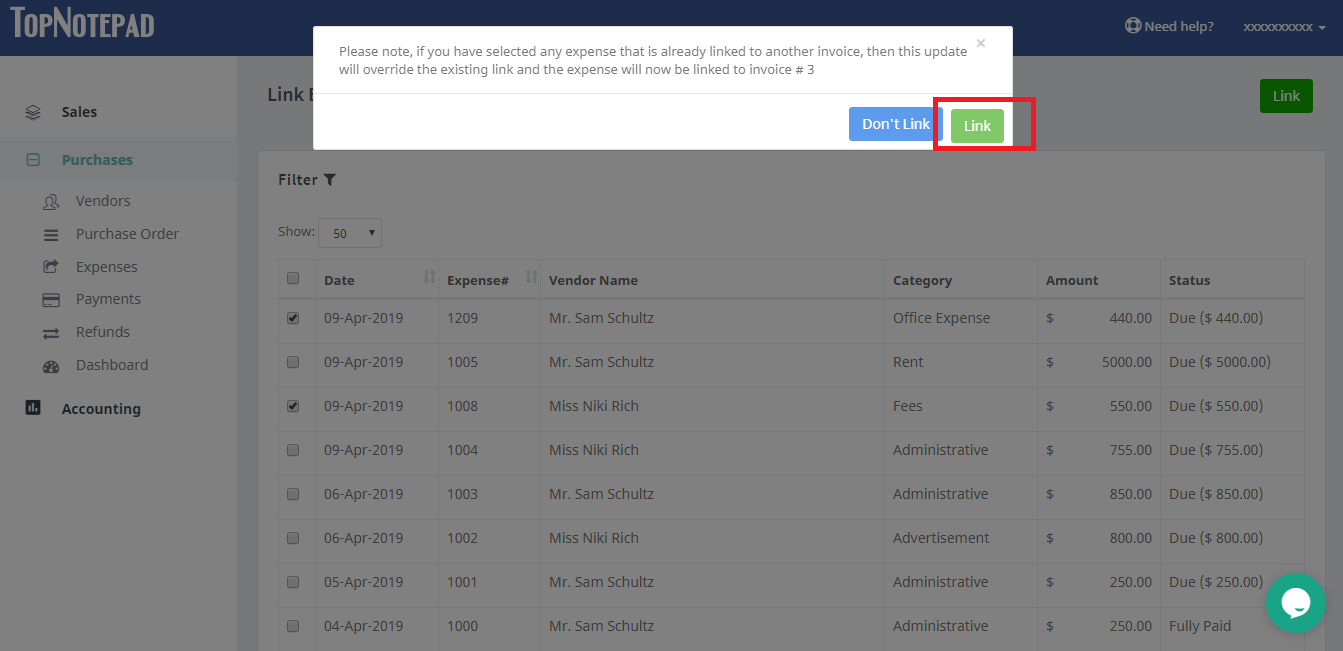
Step 4: When you click on the "Link" button the software will request you to confirm, just click on "Link".

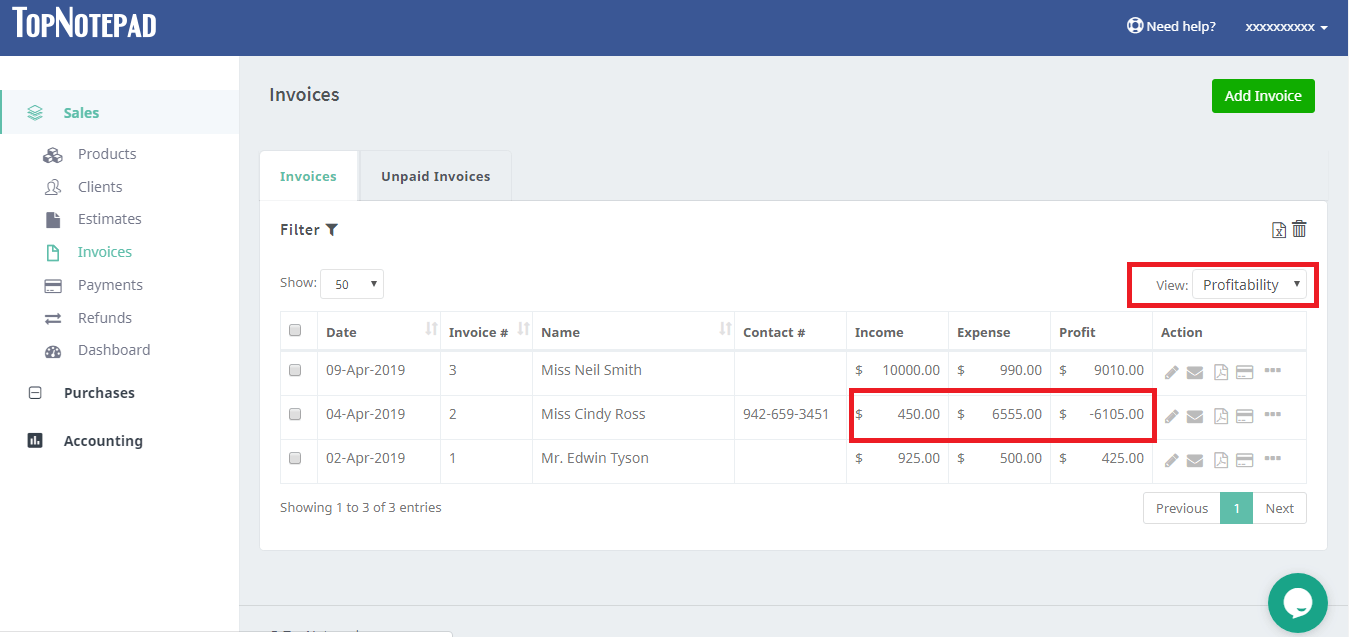
Step 5: Now, to view the gross margin or gross profit on the invoice against which you just recorded or linked an expense, please go to the “invoices” list under “sales” module and change the table view to “Profitability”, as shown in the screenshot below.

Go back to the list of all tutorials
Option 1: Record a new expense/purchase bill or against an Invoice as shown in the screenshot below.
Option 2: To link an existing expense or purchase bill or against an Invoice as shown in the screenshot below.
Option 3: To view already linked expenses and purchase bills against an Invoice as shown in the screenshot below.
To link existing expenses please choose the third option i.e., "Link existing expenses/purchase bills to this invoice".