Steps to add an expense
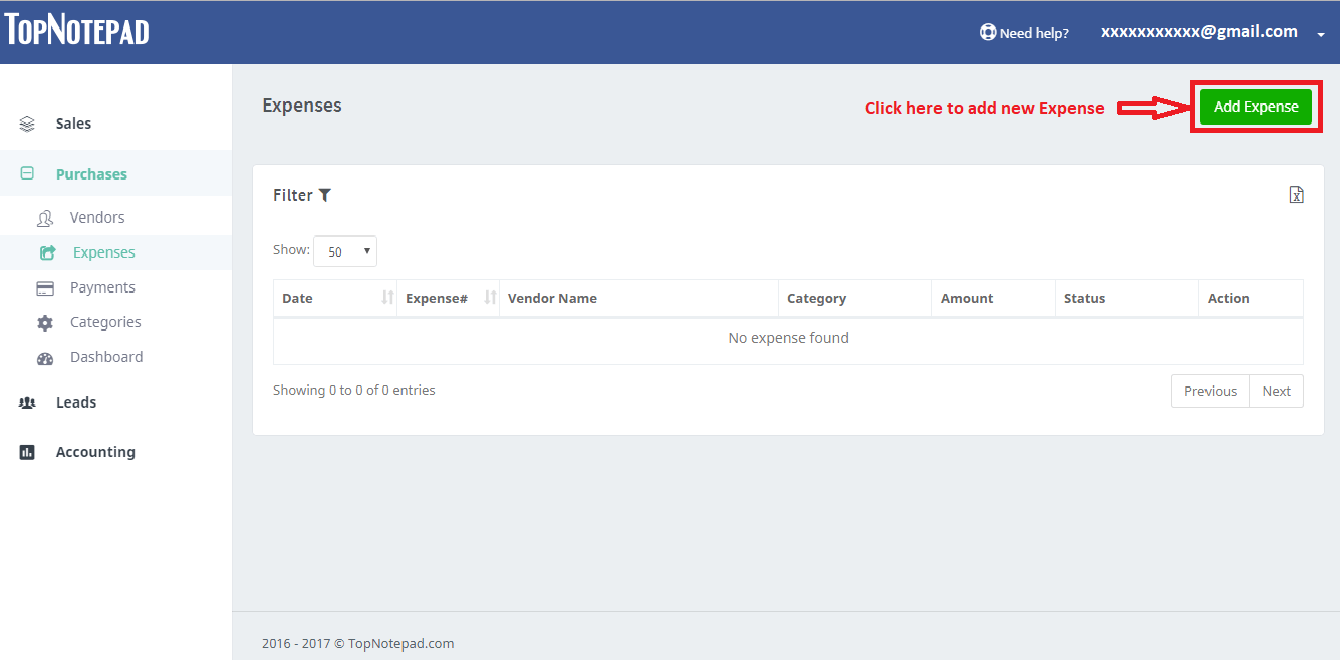
Step 1: To add an expense click on the add expense button in Purchases as shown in the screenshot below.

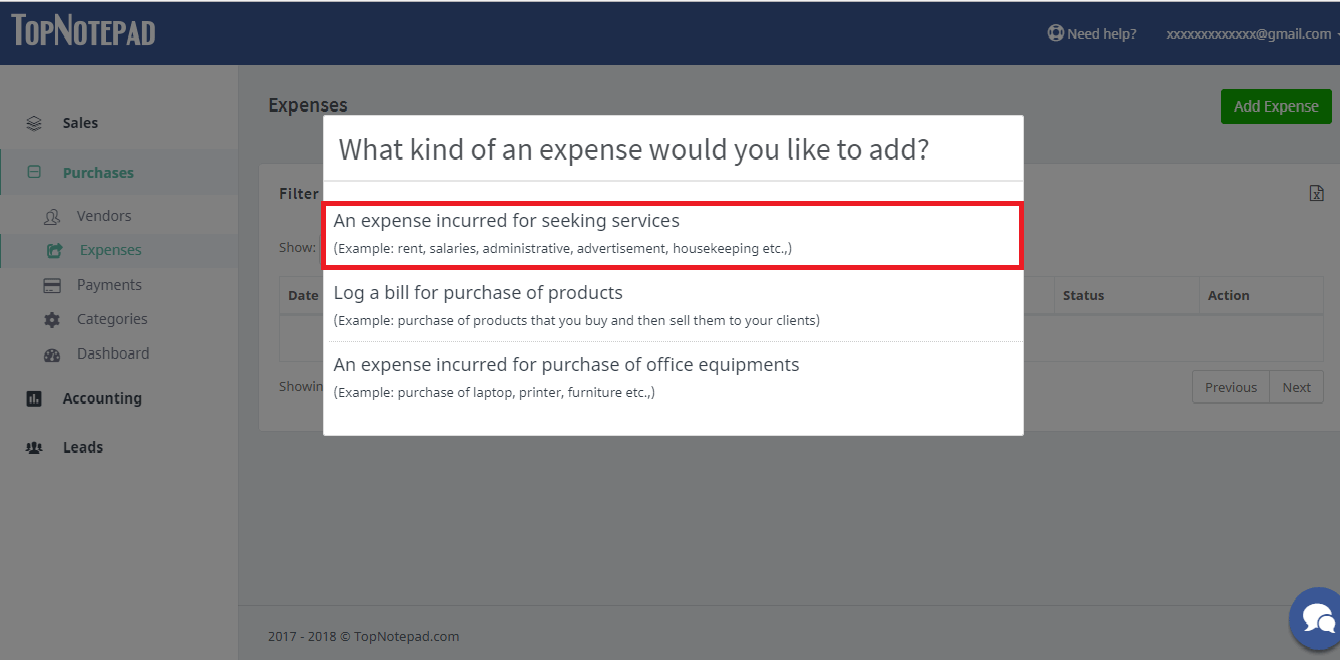
Step 2: Read through the options and choose appropriate type of expense and proceed. In our example, we are logging an expense incurred for seeking services.
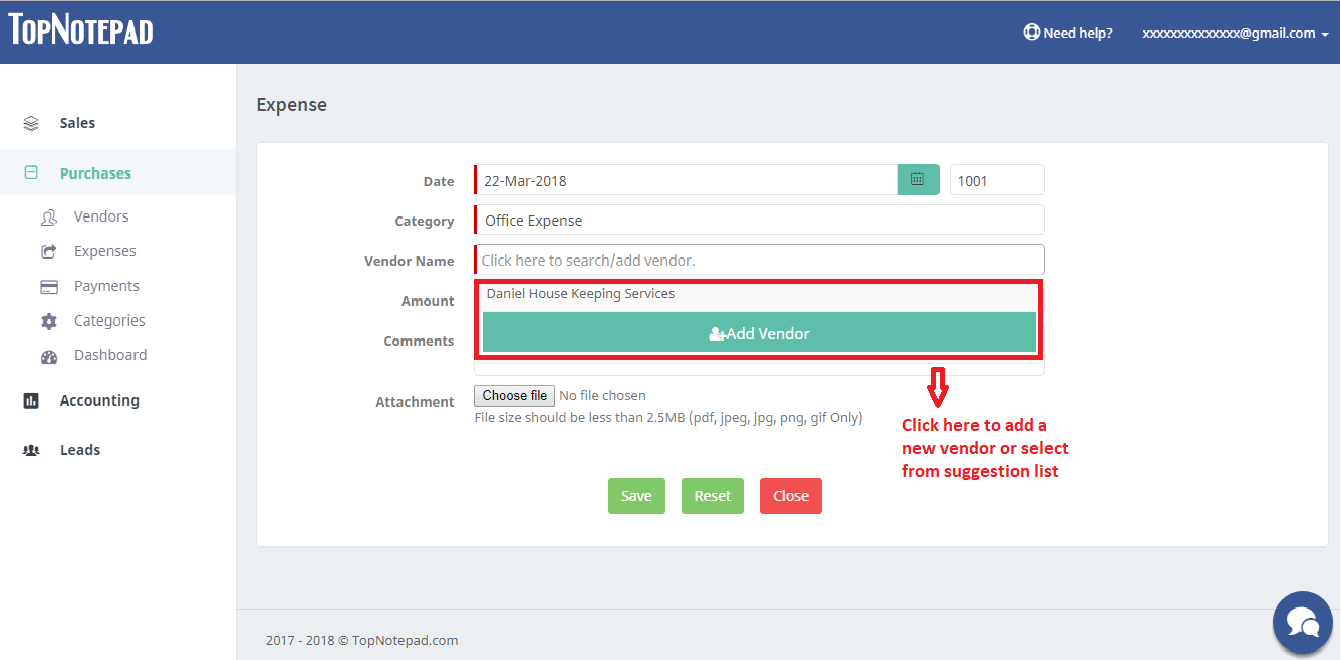
Step 3: A form would open-up to log an expense. Next, add details of your vendor. If it’s an existing vendor choose from the suggestion and if the vendor is new, please click on “add new vendor” button and add the details.

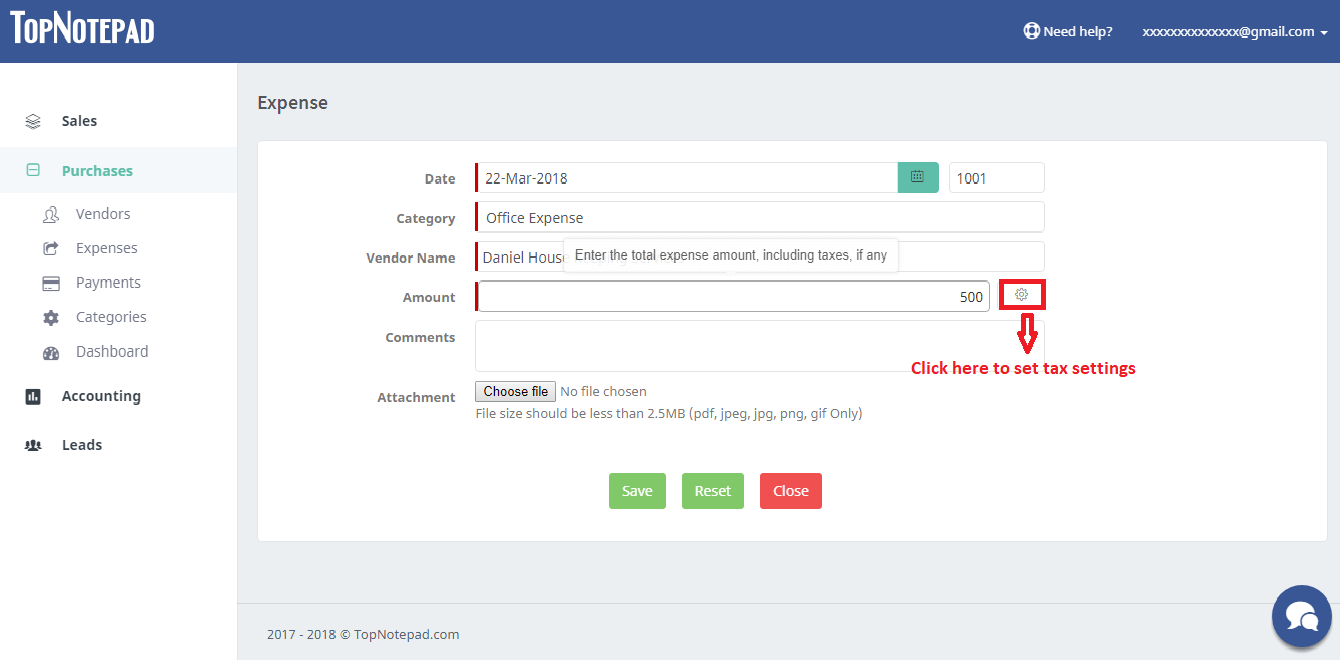
Step 4: If the expense amount includes tax which can be claimed to reduce your net tax liability, in that case click on the “cog wheel” icon to provide details.
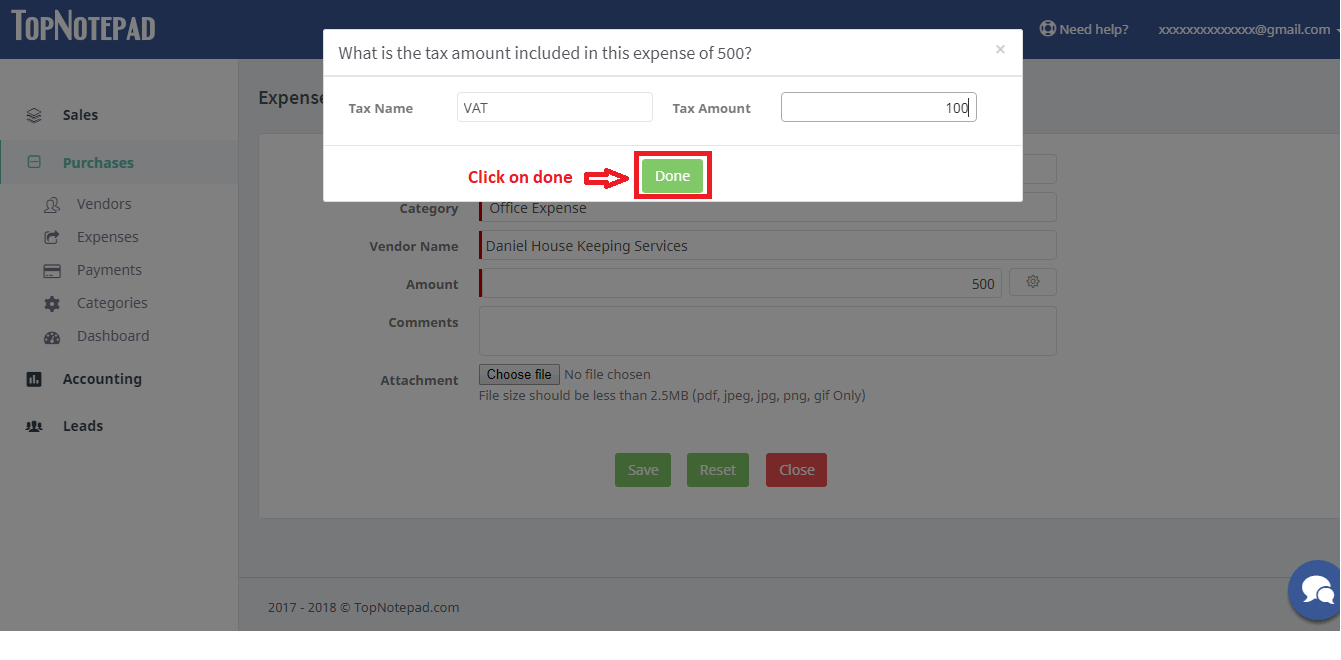
Step 5: You will see a pop-up asking you details of the tax amount included in the expense. Please provide both tax name and the amount. Please note, it’s not the percentage, put absolute amount of tax you paid.
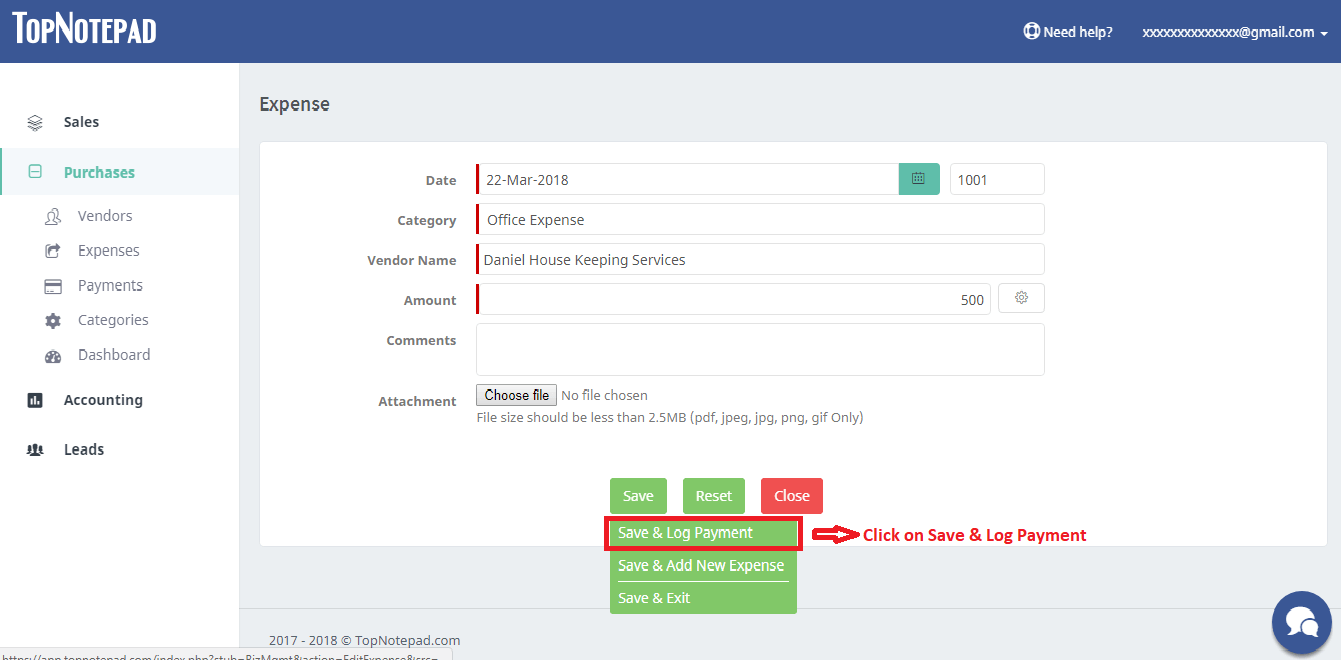
Step 6: After providing the required information, click on ‘Save & Log payment’ options, if you like to add the payment details against the expense. You will also see option to “save & add new expense” and another option to “save & exit”, if you just want to save the expense.
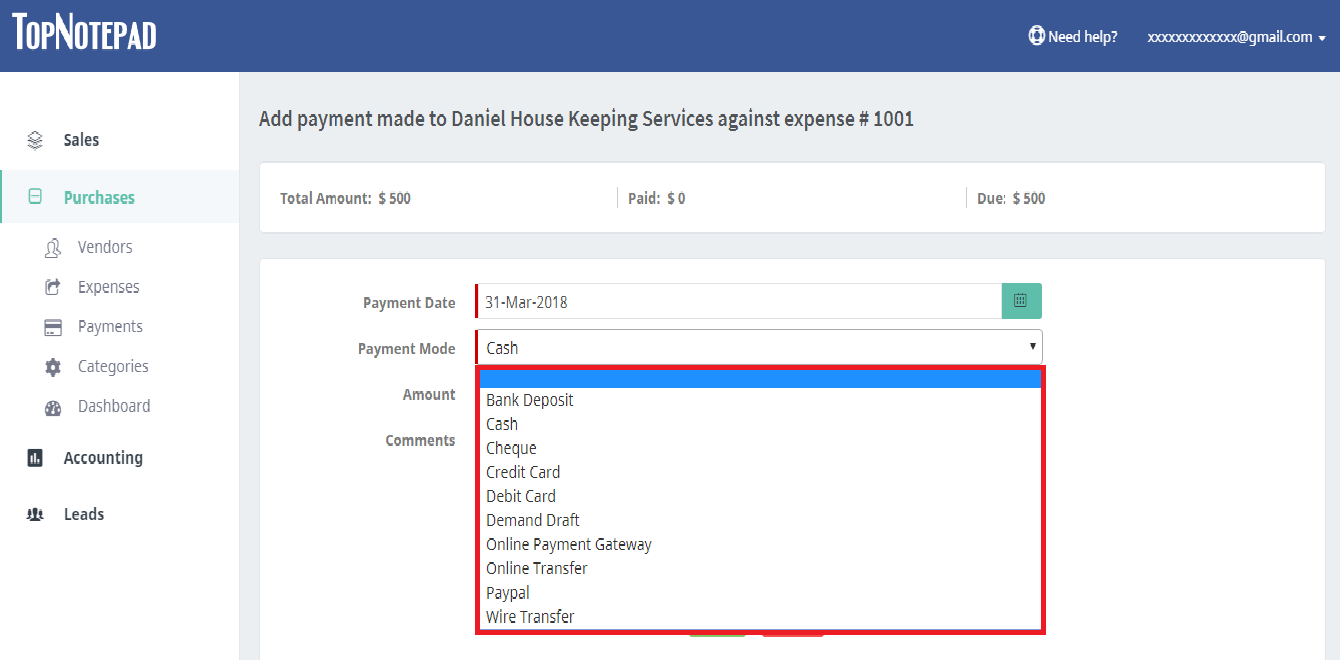
Step 7: After clicking on “Save & Log Payment” payment page will open. On the payments page, select the payment mode from the drop down.

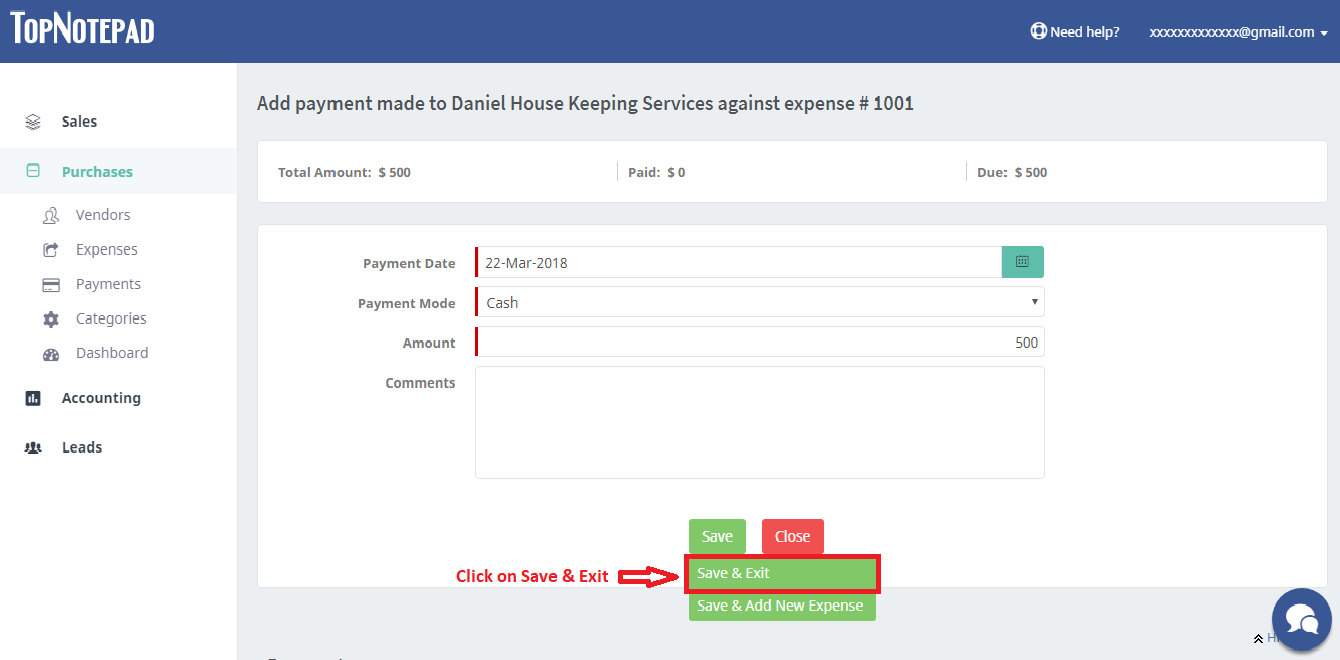
Step 8: After providing the required information click on save & exit button to log the payment against the expense.
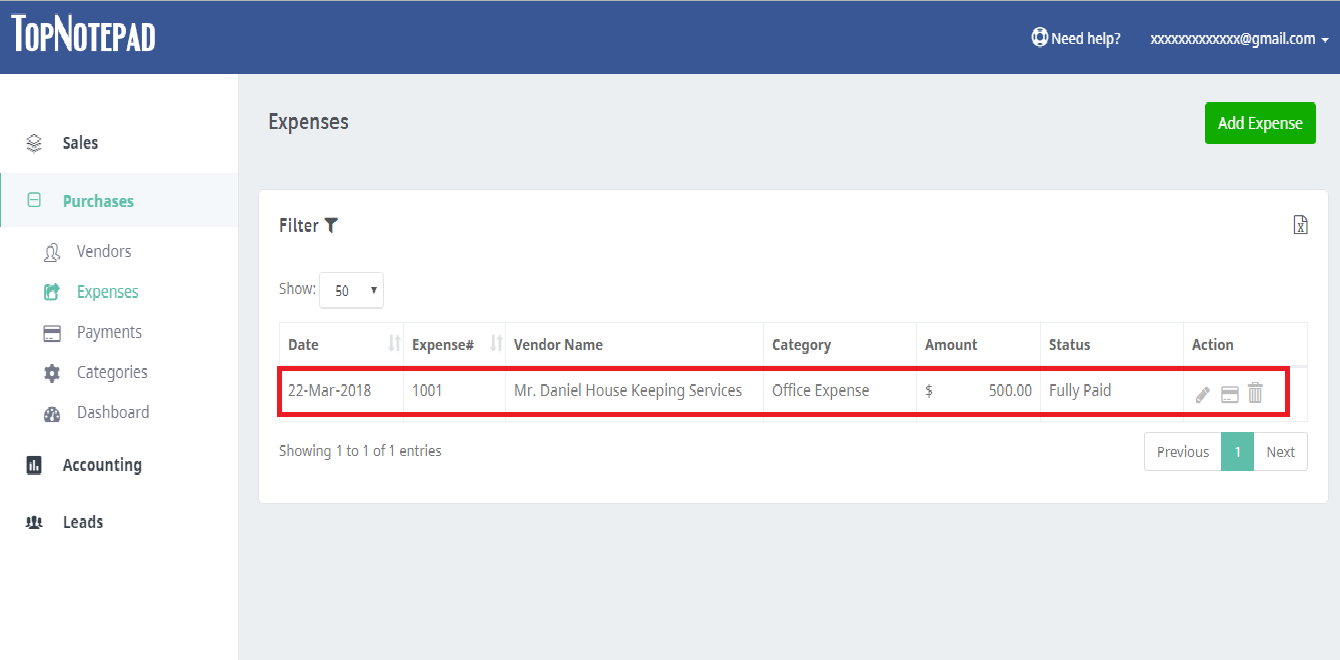
Step 9: After clicking on save & exit it will take you to the expense listing.
Go back to the list of all tutorials
Step 2: Read through the options and choose appropriate type of expense and proceed. In our example, we are logging an expense incurred for seeking services.
Step 3: A form would open-up to log an expense. Next, add details of your vendor. If it’s an existing vendor choose from the suggestion and if the vendor is new, please click on “add new vendor” button and add the details.
Step 4: If the expense amount includes tax which can be claimed to reduce your net tax liability, in that case click on the “cog wheel” icon to provide details.
Step 5: You will see a pop-up asking you details of the tax amount included in the expense. Please provide both tax name and the amount. Please note, it’s not the percentage, put absolute amount of tax you paid.
Step 6: After providing the required information, click on ‘Save & Log payment’ options, if you like to add the payment details against the expense. You will also see option to “save & add new expense” and another option to “save & exit”, if you just want to save the expense.
Step 7: After clicking on “Save & Log Payment” payment page will open. On the payments page, select the payment mode from the drop down.
Step 8: After providing the required information click on save & exit button to log the payment against the expense.
Step 9: After clicking on save & exit it will take you to the expense listing.
Go back to the list of all tutorials