Steps to log a purchase bill
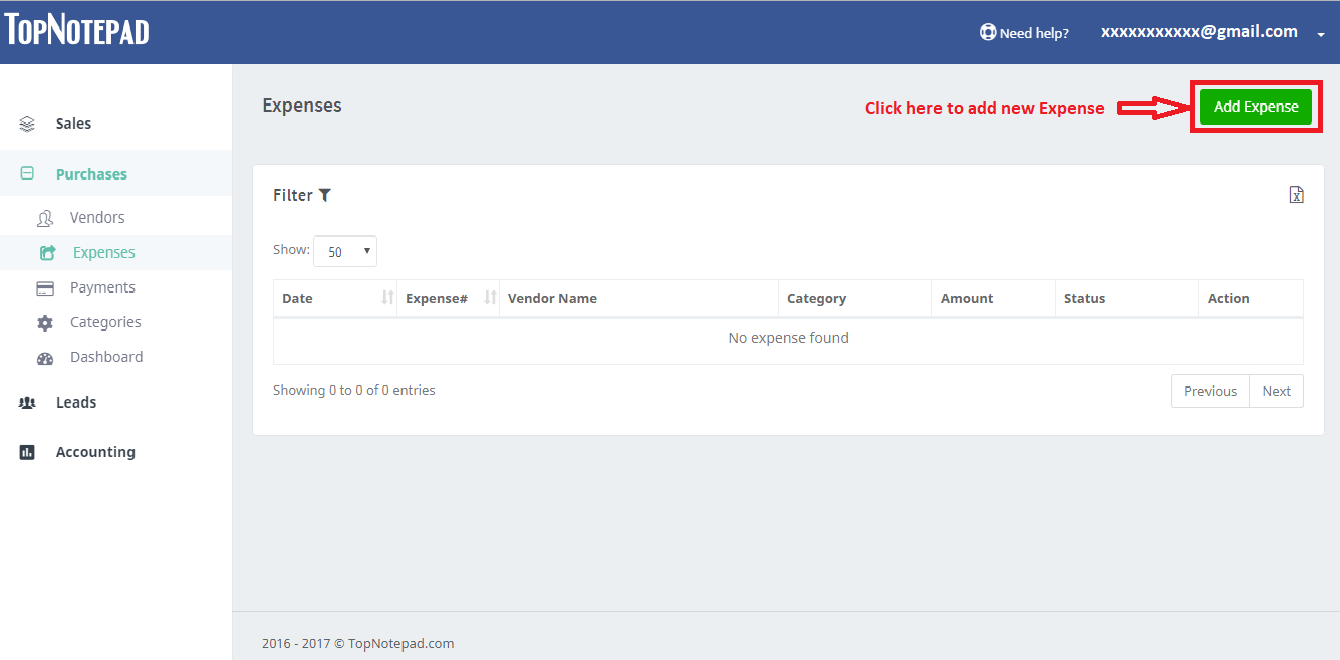
Step 1: To add a new bill first click on the “add expense” button in “expenses” page under purchases module as shown in the screenshot below.

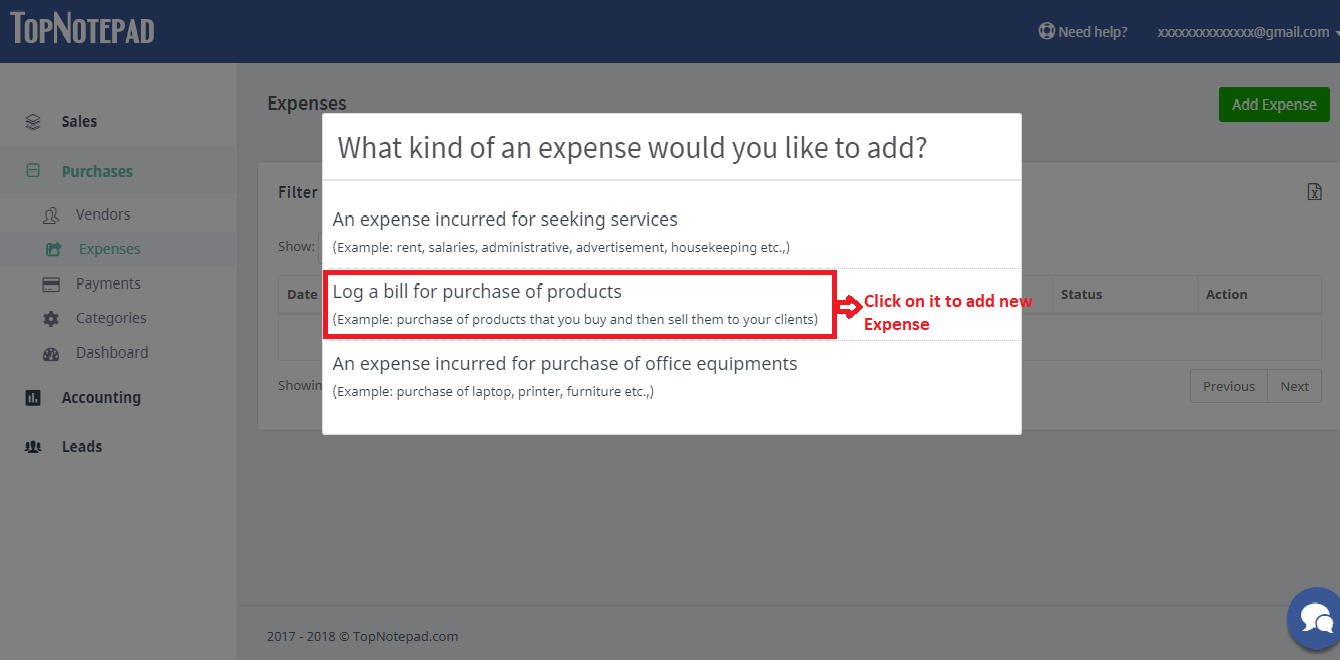
Step 2: Read through the options and choose appropriate type of expense and proceed. In our example, we are logging a purchase bill.
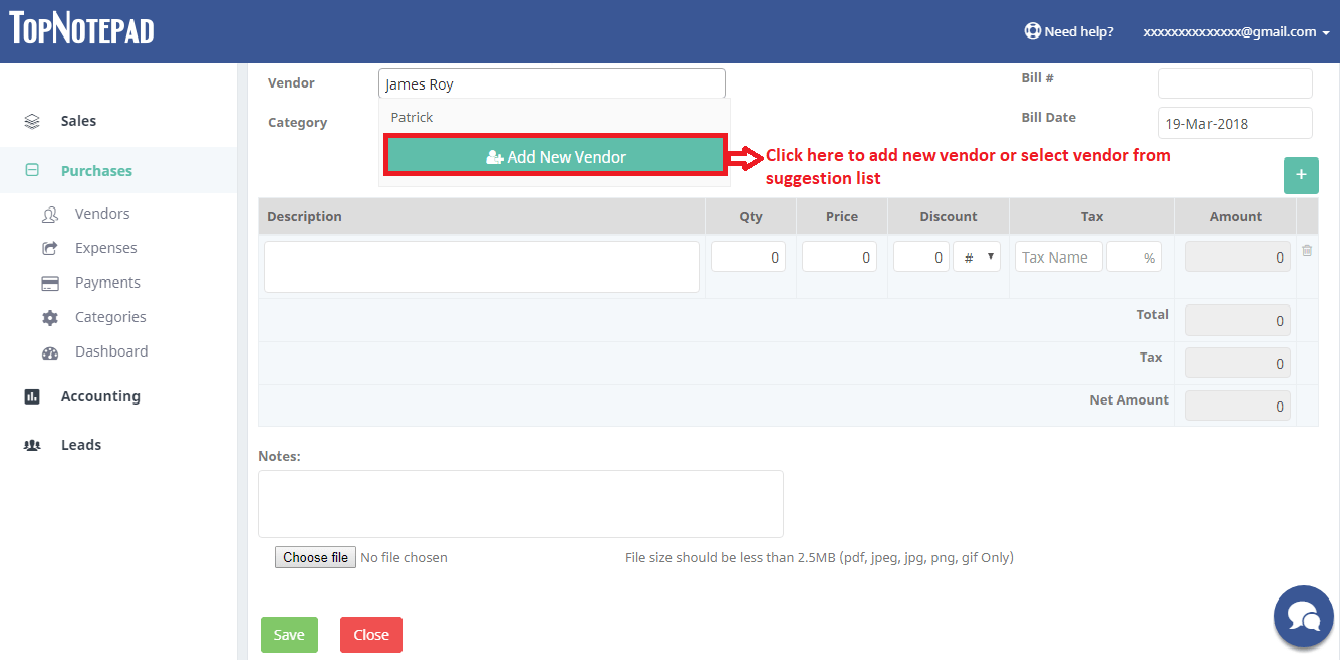
Step 3: A form would open-up to log a new bill. Next, add details of your vendor. If it’s an existing vendor choose from the suggestions and if the vendor is new, please click on “add new vendor” button and add the details.
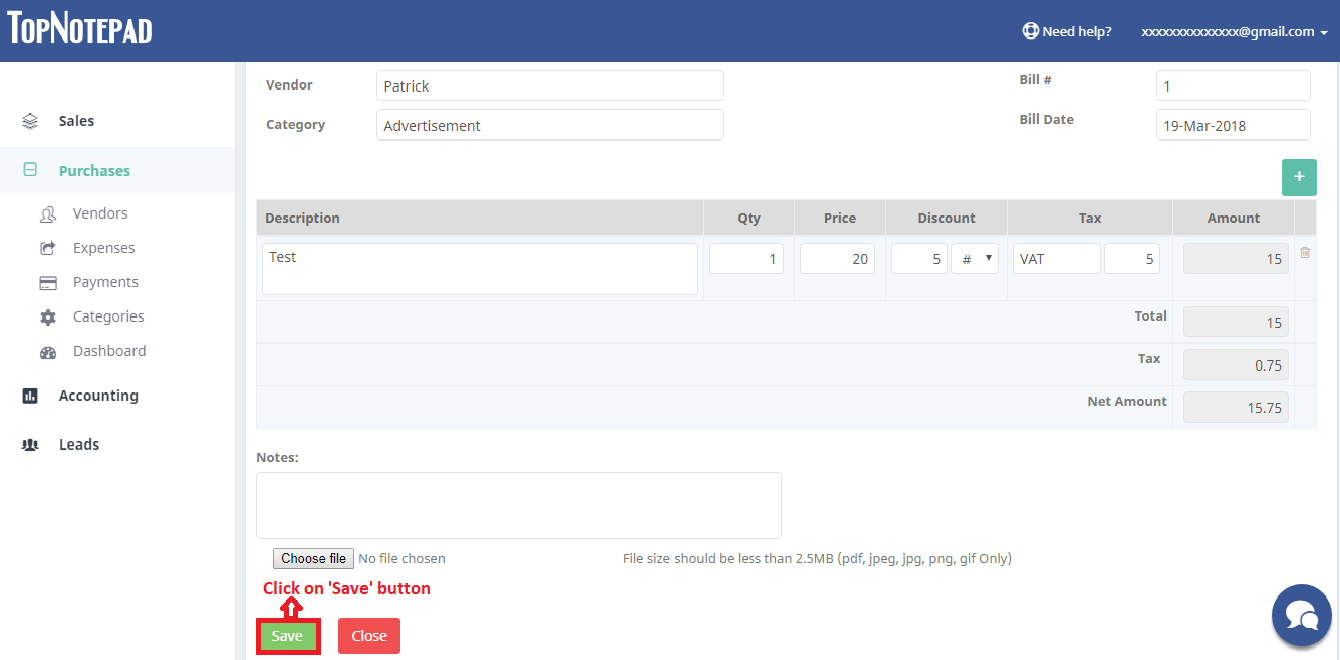
Step 4: After providing the required information, click on ‘Save & Log payment’ options, if you like to add the payment details against the bill. You will also see option to “save & add new bill” and another option to “save & exit”, if you just want to save this bill and log the payment details later.
Go back to the list of all tutorials
Step 2: Read through the options and choose appropriate type of expense and proceed. In our example, we are logging a purchase bill.
Step 3: A form would open-up to log a new bill. Next, add details of your vendor. If it’s an existing vendor choose from the suggestions and if the vendor is new, please click on “add new vendor” button and add the details.
Step 4: After providing the required information, click on ‘Save & Log payment’ options, if you like to add the payment details against the bill. You will also see option to “save & add new bill” and another option to “save & exit”, if you just want to save this bill and log the payment details later.
Go back to the list of all tutorials