Steps to log a refund & issue a refund receipt
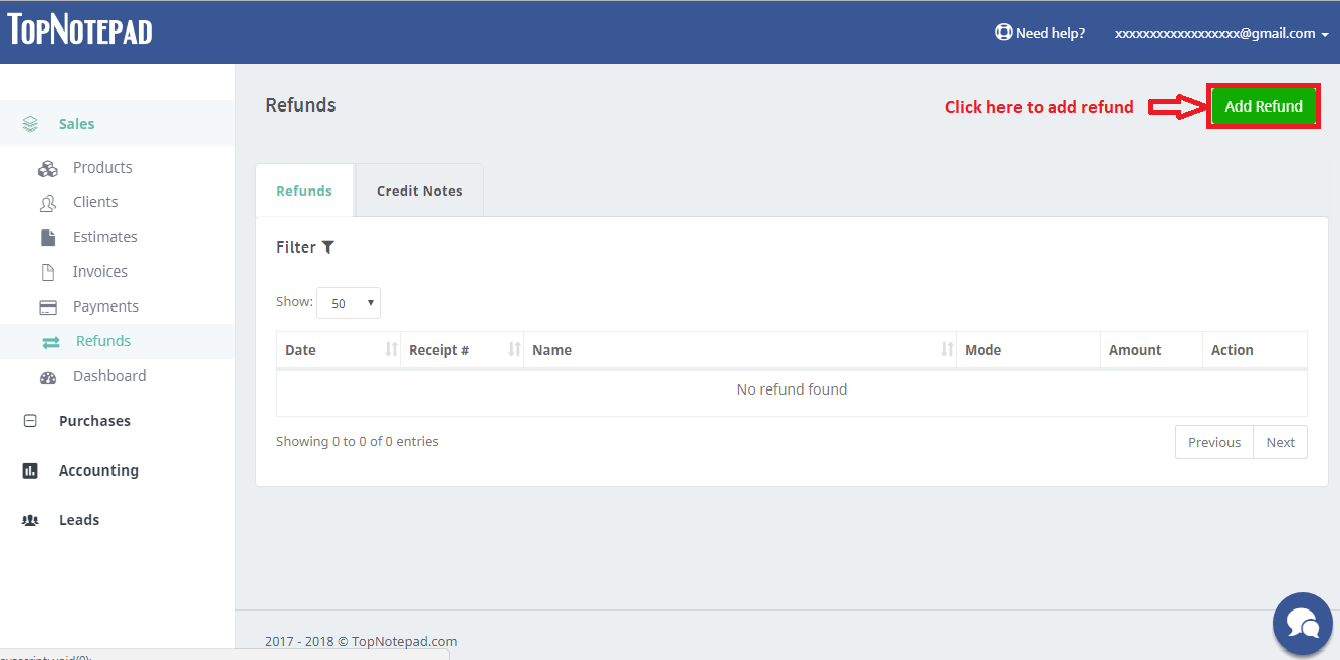
Step 1: To log a refund and create refund receipt, click on the add refund button as shown in the screenshot below.

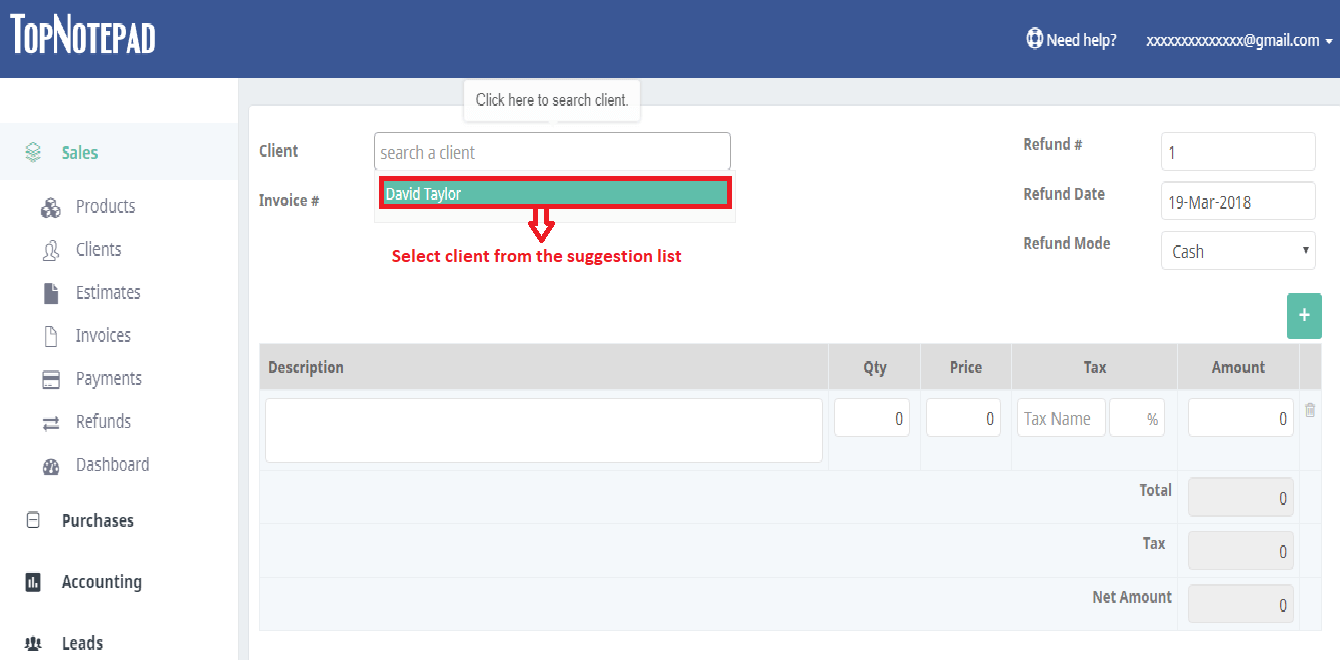
Step 2: Please select an existing client from the suggestions list. Next, select the invoice number against which the refund needs to be issued. Please note, a refund can be issued for amount no more than the amount paid by the client against the specific invoice against which the refund is being issued. If you have not logged a payment or never received a payment, then there is nothing to refund and the software will not allow you to create a refund for such unpaid invoice.

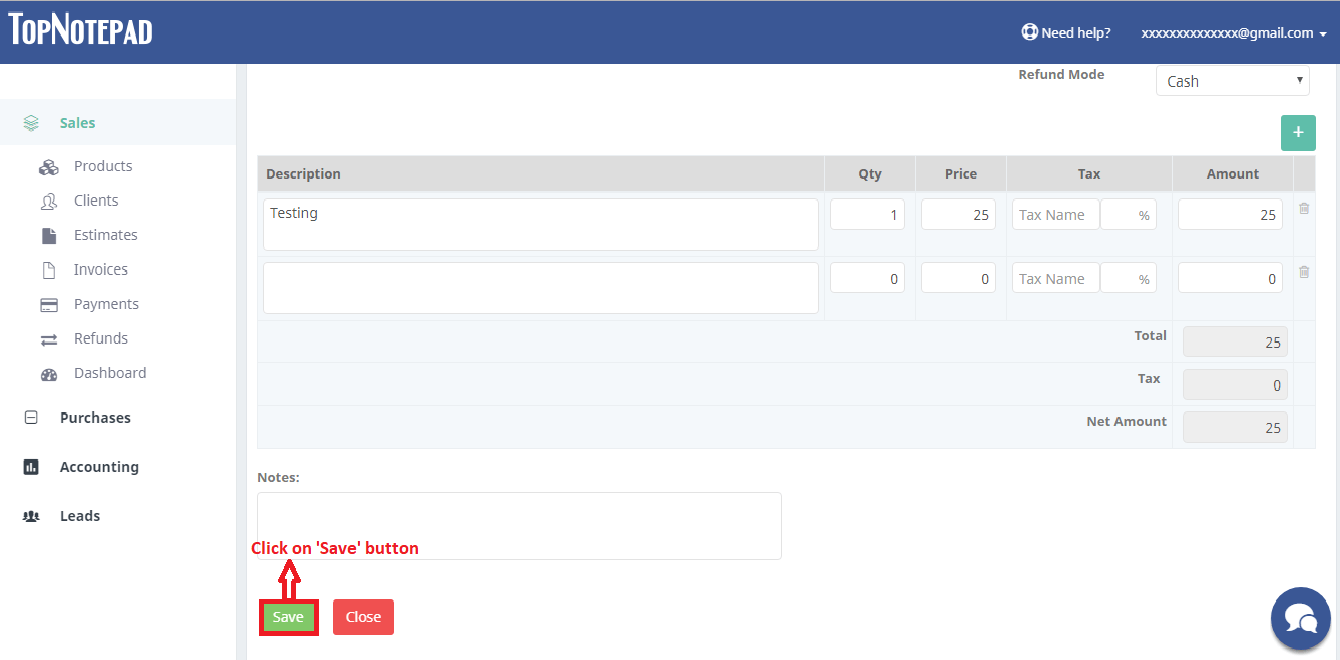
Step 3: Fill out the details of refund as shown below and click on ‘Save’ button.

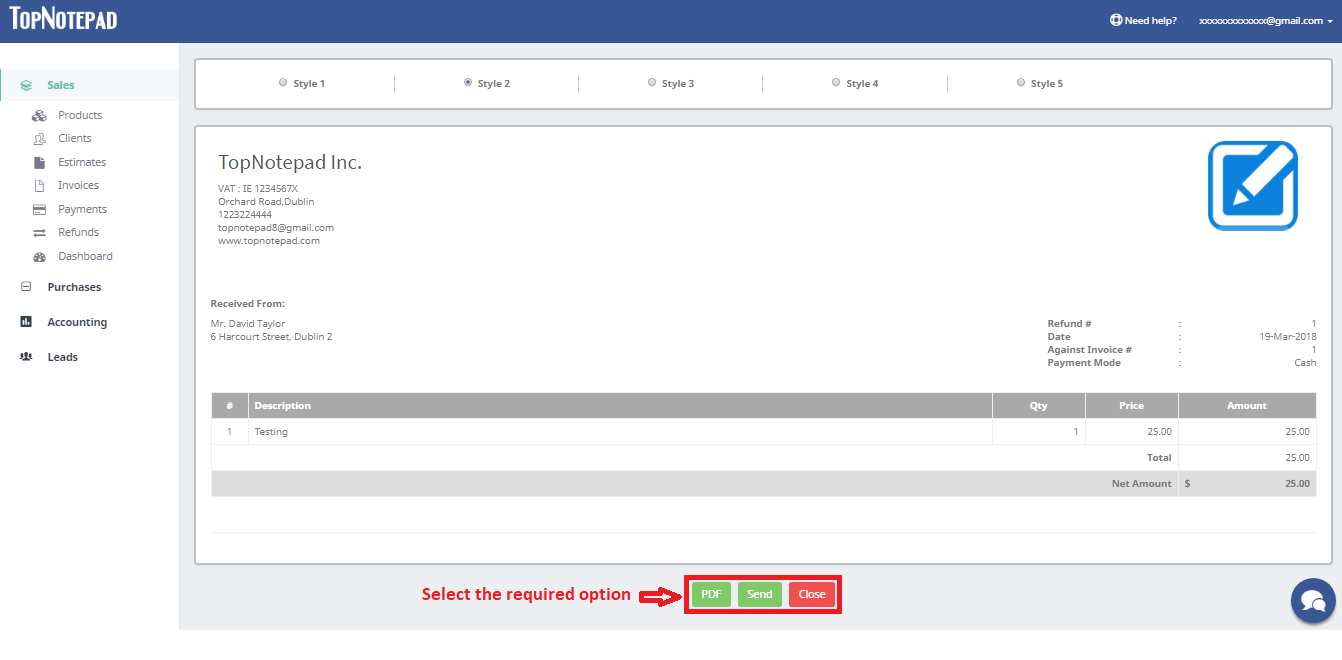
Step 4: After clicking on ‘Save’ button you can view the refund. You have option to choose the style you like the most. Down below the refund receipt you will see PDF and email option as well.

Go back to the list of all tutorials

Step 2: Please select an existing client from the suggestions list. Next, select the invoice number against which the refund needs to be issued. Please note, a refund can be issued for amount no more than the amount paid by the client against the specific invoice against which the refund is being issued. If you have not logged a payment or never received a payment, then there is nothing to refund and the software will not allow you to create a refund for such unpaid invoice.

Step 3: Fill out the details of refund as shown below and click on ‘Save’ button.

Step 4: After clicking on ‘Save’ button you can view the refund. You have option to choose the style you like the most. Down below the refund receipt you will see PDF and email option as well.

Go back to the list of all tutorials