Steps to upload digital signature
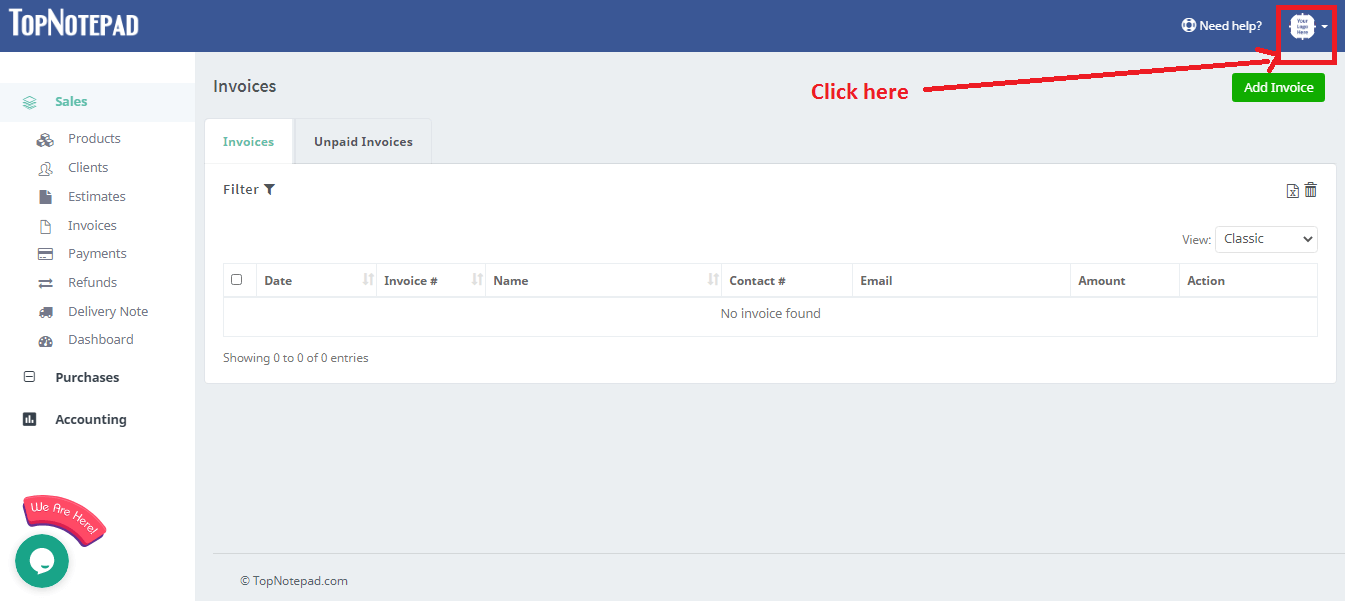
Step 1: Click on your user name on the top right.

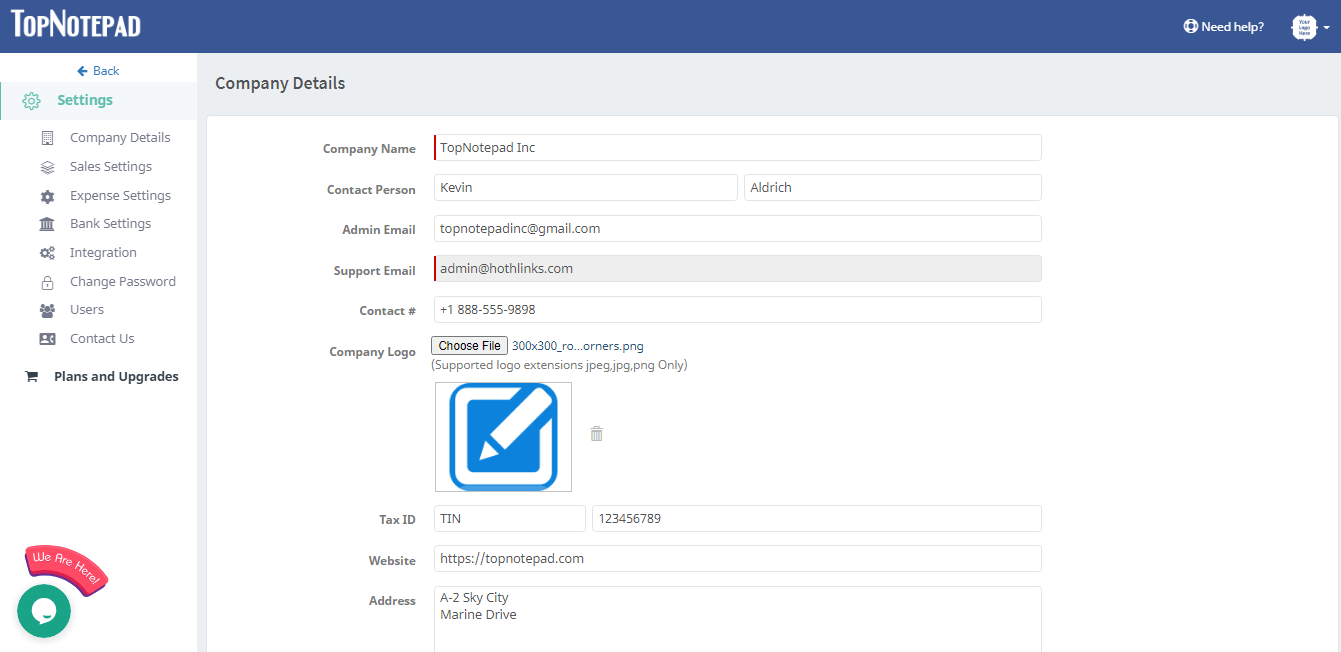
Step 2: From the drop down, please click on the ‘Settings’ option.

Step 3: Edit/Update the required information like company name, support email etc.,

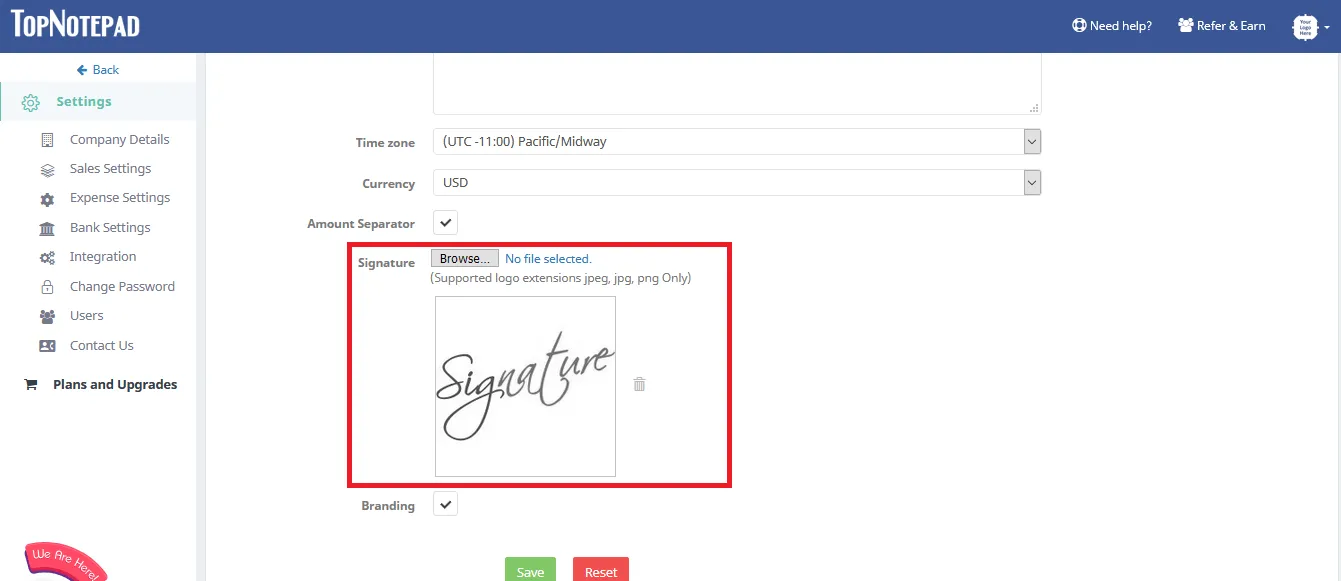
Step 4: Scroll down to signature option

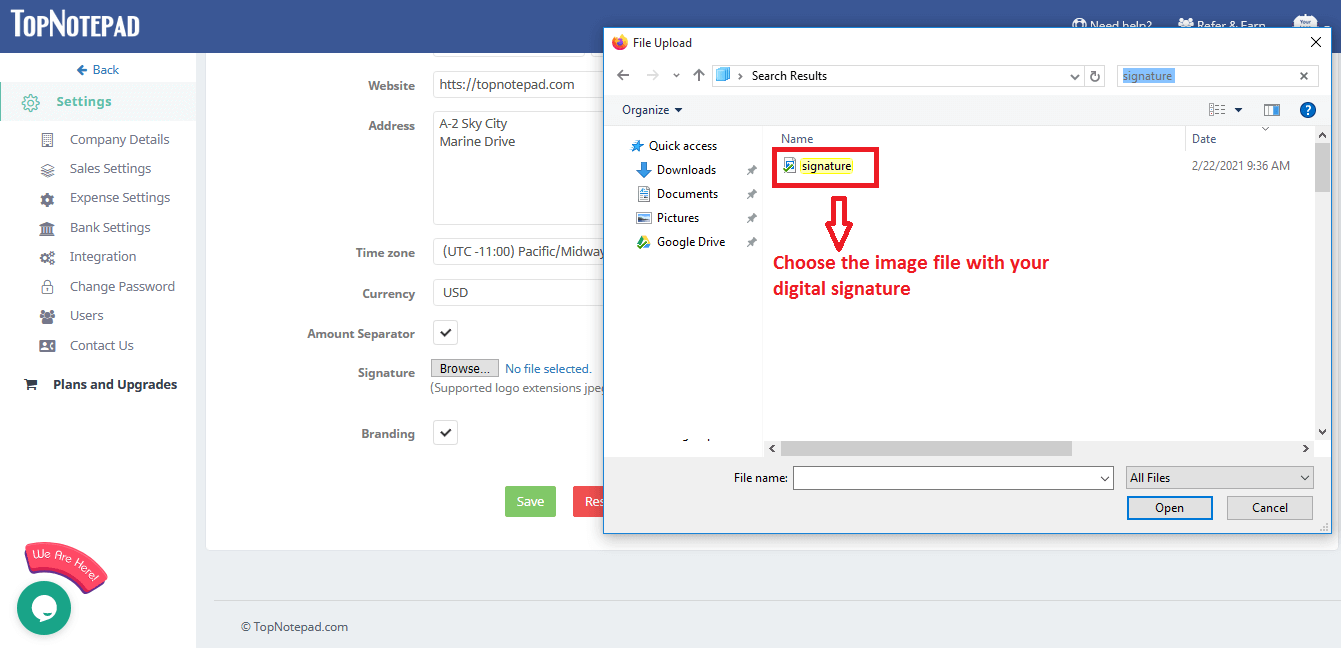
Step 5: Click on browse button to choose the image file with your digital signature

Step 6: Upon successful upload the signature would now be available for use in invoice, estimates, delivery note and purchase order

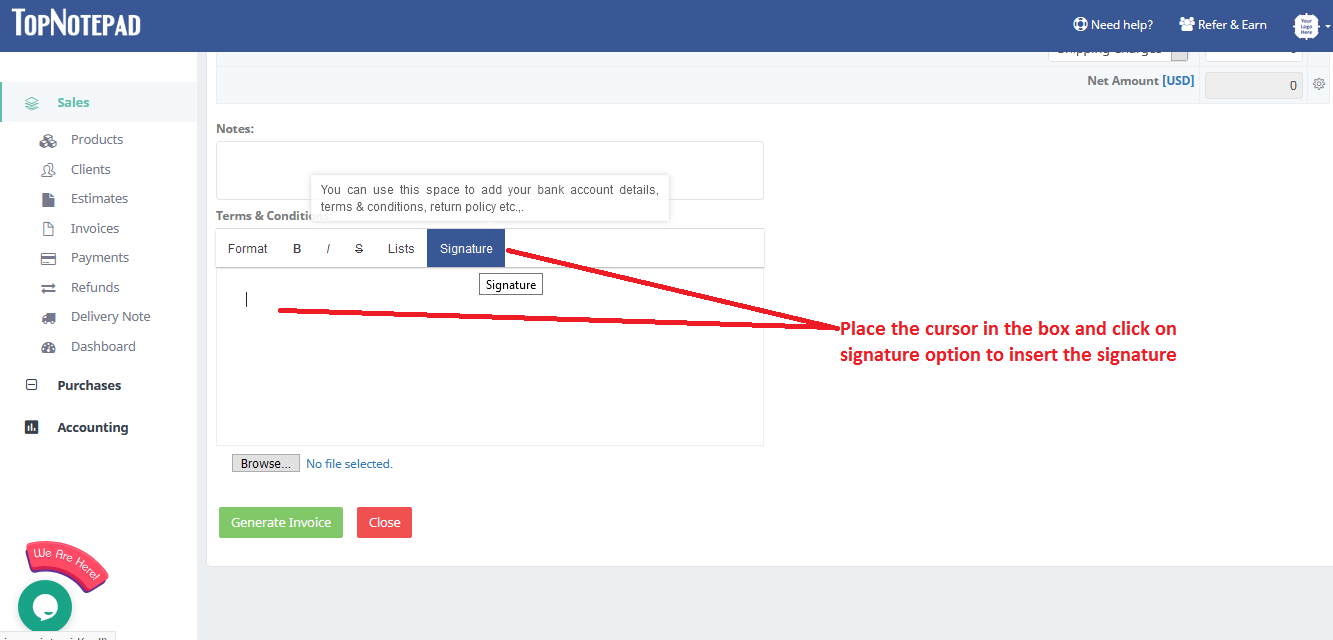
Step 7: You can now insert signature as shown below on invoice/estimate/delivery note or purchase order by using the option available in the free text area when you are creating invoice/estimate/delivery note or purchase order.

Go back to the list of all tutorials

Step 4: Scroll down to signature option
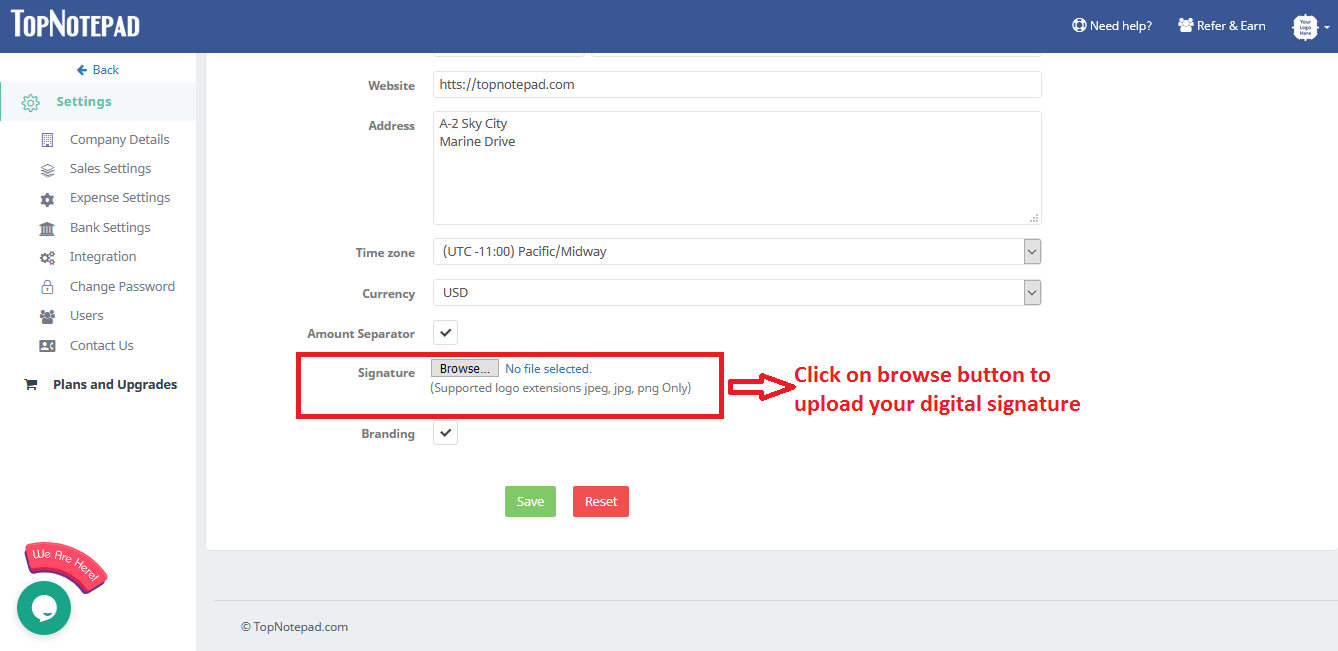
Step 5: Click on browse button to choose the image file with your digital signature
Step 6: Upon successful upload the signature would now be available for use in invoice, estimates, delivery note and purchase order
Step 7: You can now insert signature as shown below on invoice/estimate/delivery note or purchase order by using the option available in the free text area when you are creating invoice/estimate/delivery note or purchase order.
Go back to the list of all tutorials