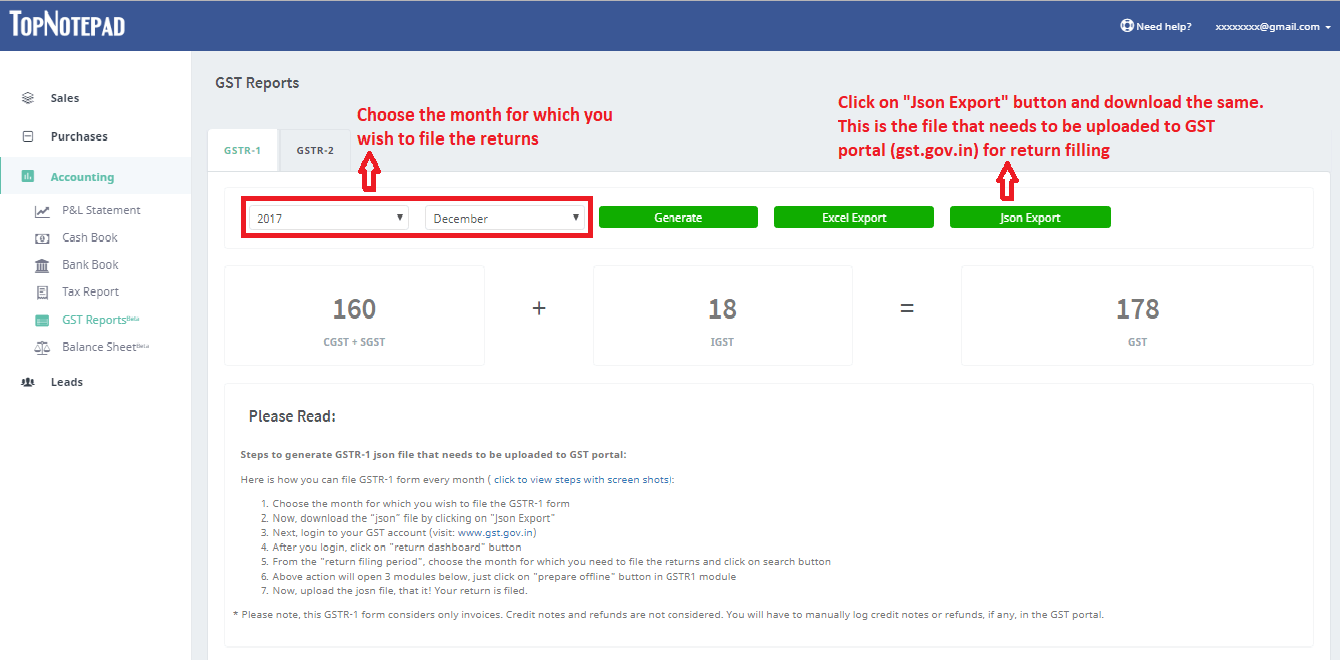
Generate GSTR-1 form data in one click and file GST returns
1. Select the required month for which you wish to generate a GSTR-1 form, you need to provide turnover of previous financial year and immediate preceding quarter as well, if applicable and hit the green button “generate json file”. This will download the file that you need to upload to the GST portal for filing the return.

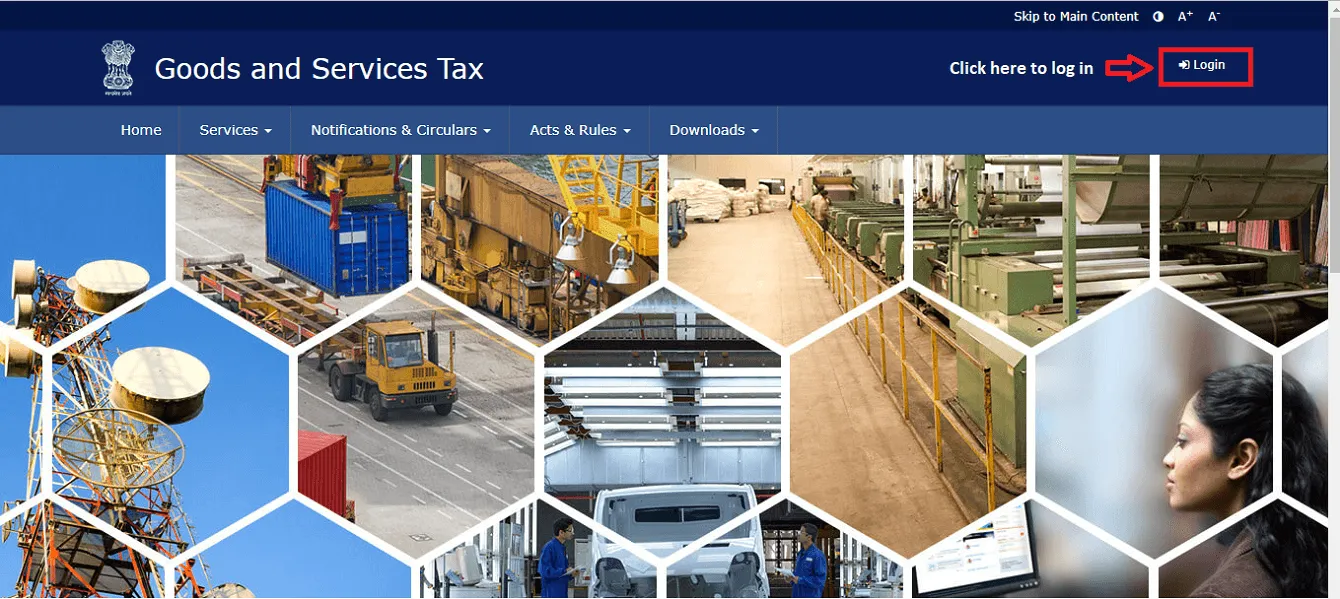
2. Visit GST portal . Click on login button.

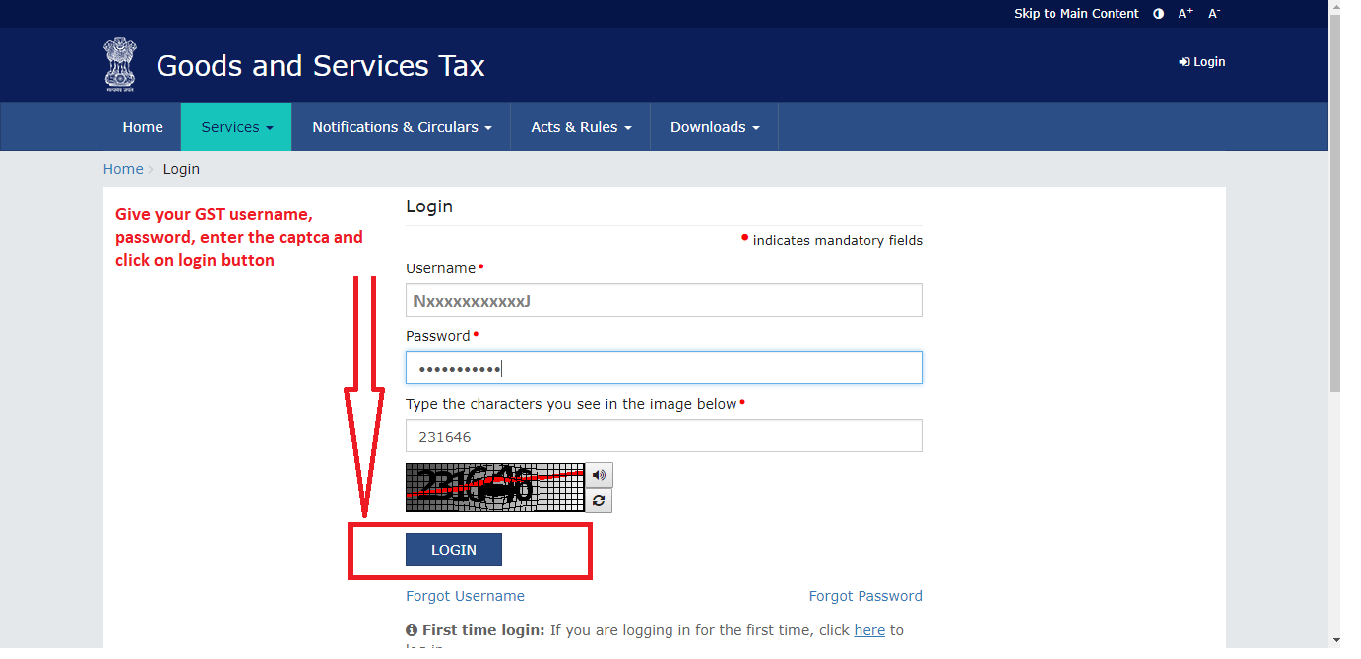
3. Provide your credentials and login

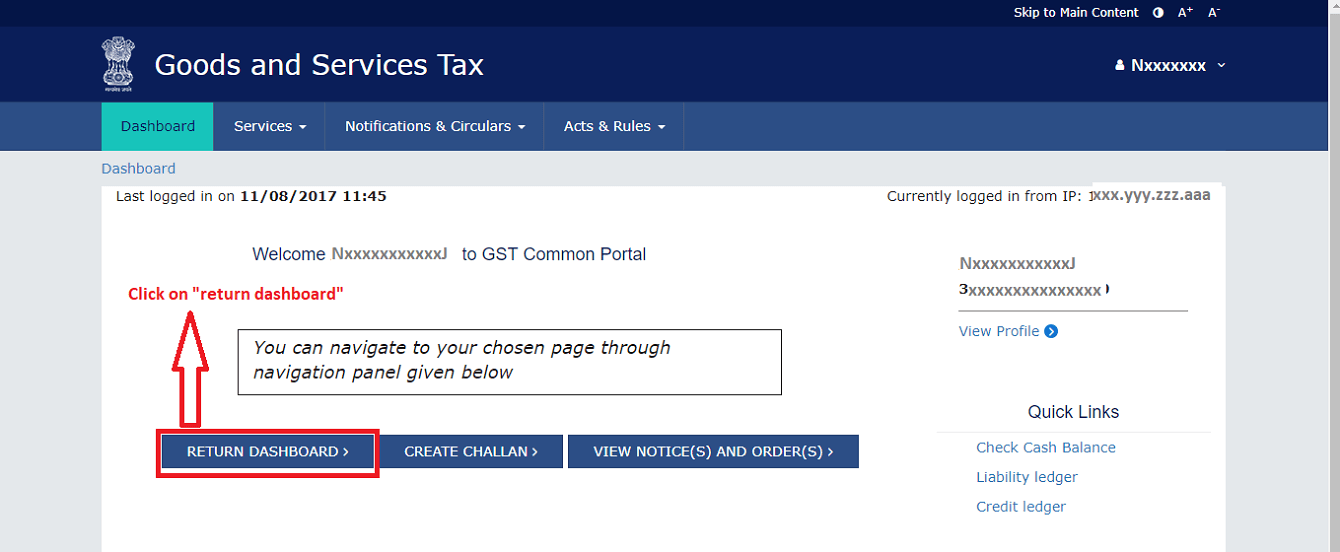
4. After logging in, click on “return dashboard”

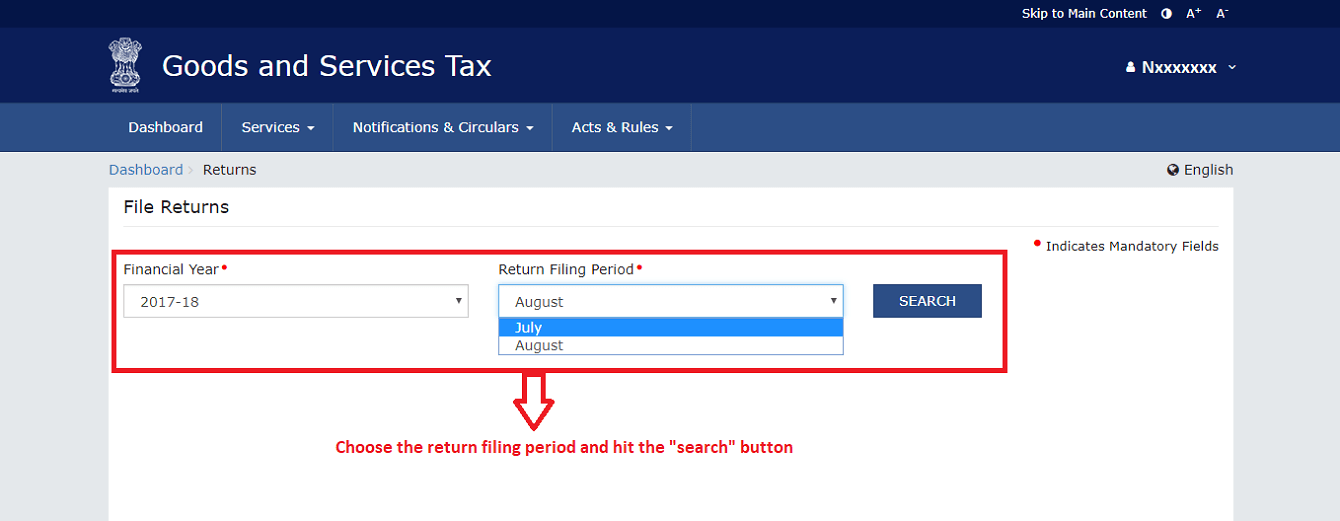
5. Select the month for which you wish to file the return and hit the search button

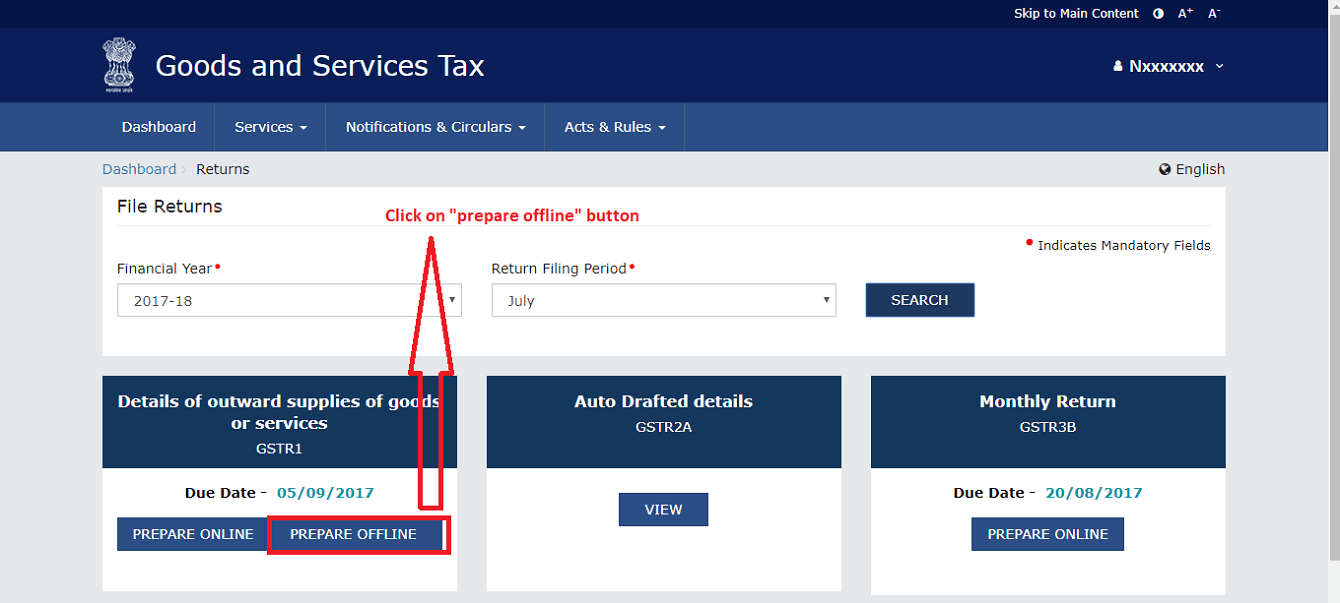
6. Click on “prepare offline”

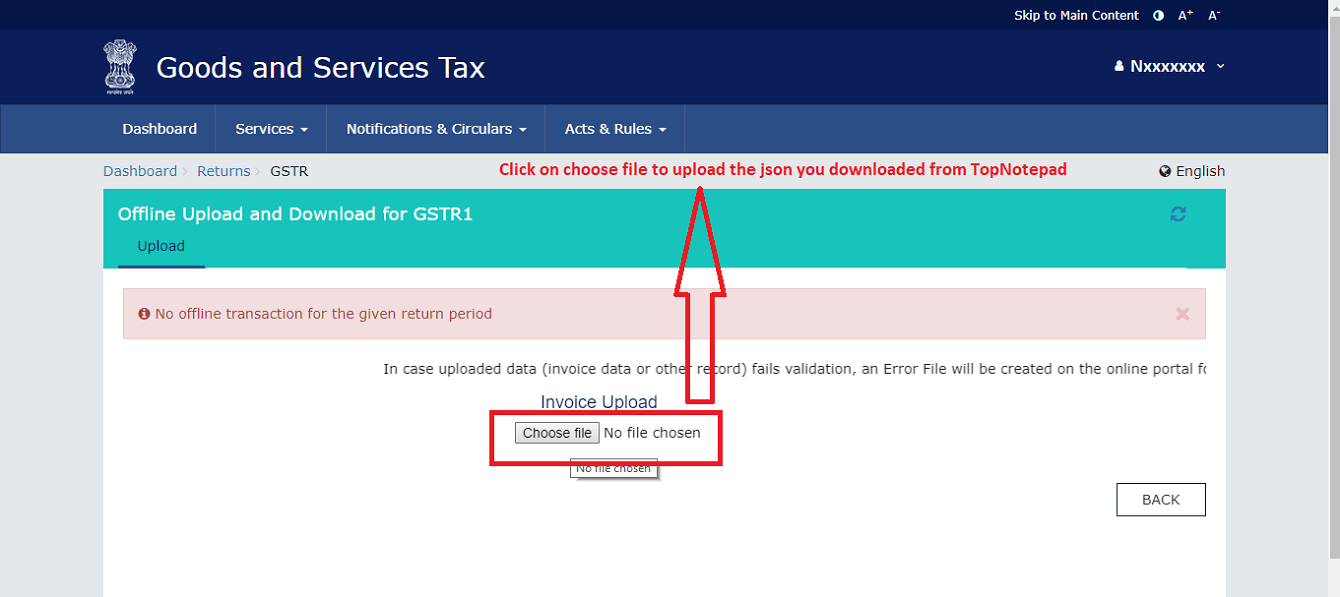
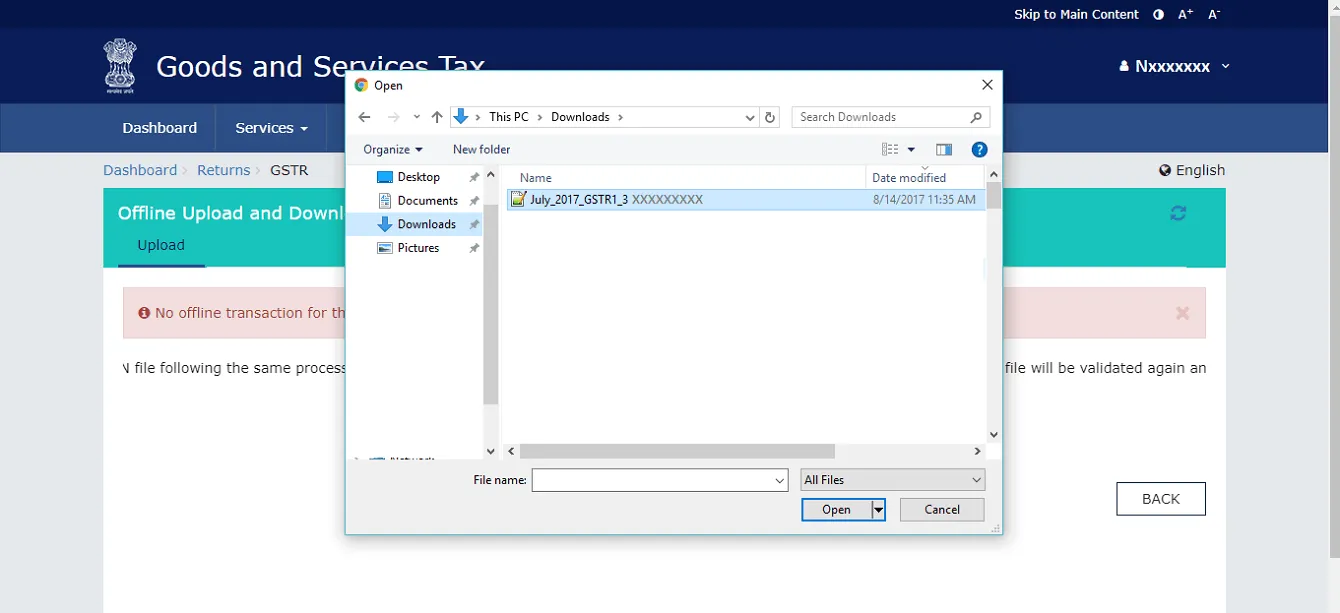
7. Upload the file you downloaded from TopNotepad


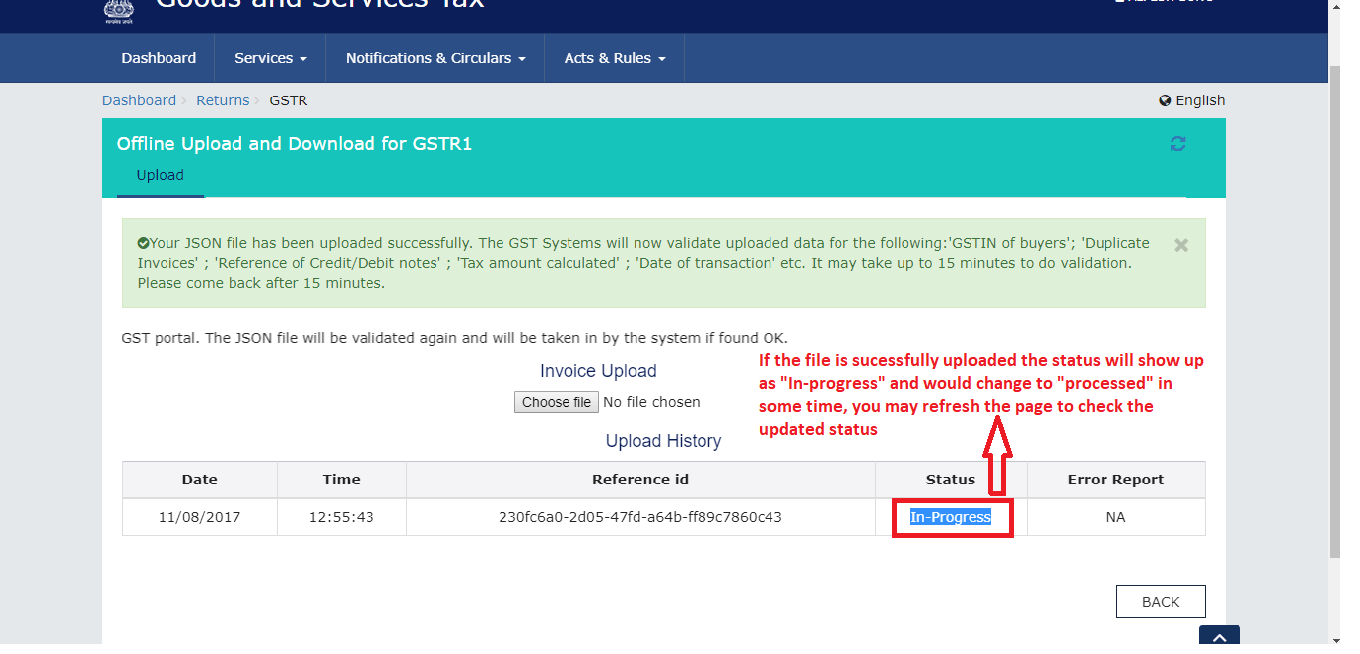
8. The file may take a few seconds to get processed depending on count of invoice

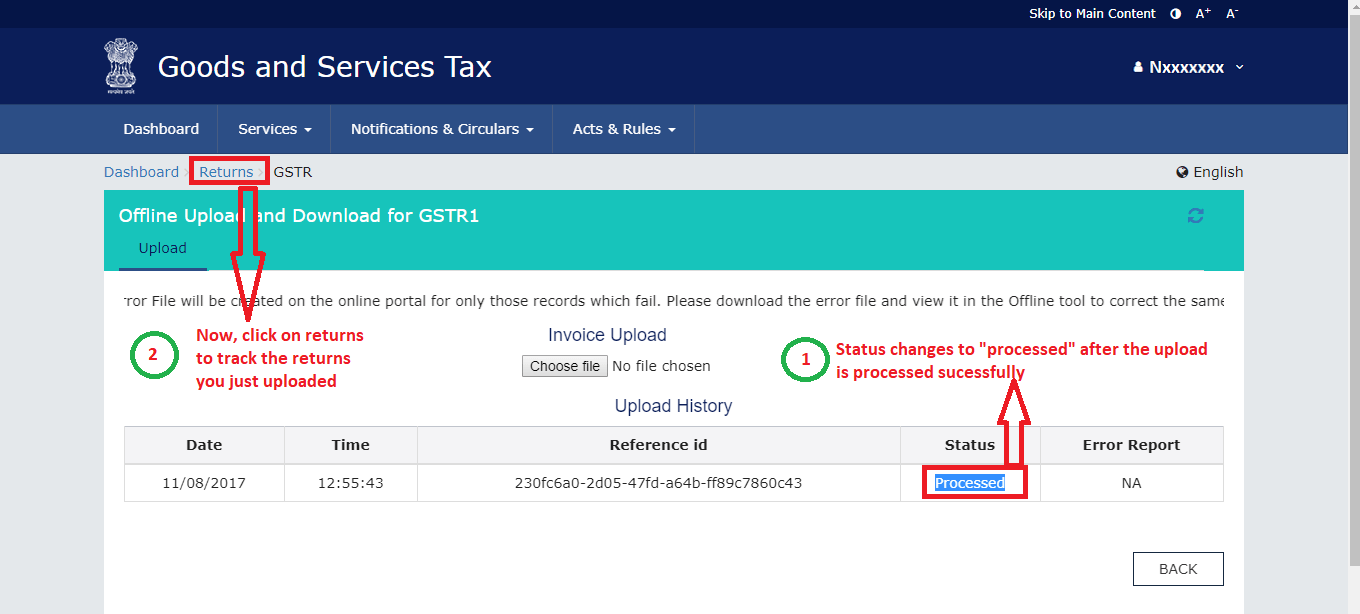
9. Once the file is successfully processed, click on return (as shown below)

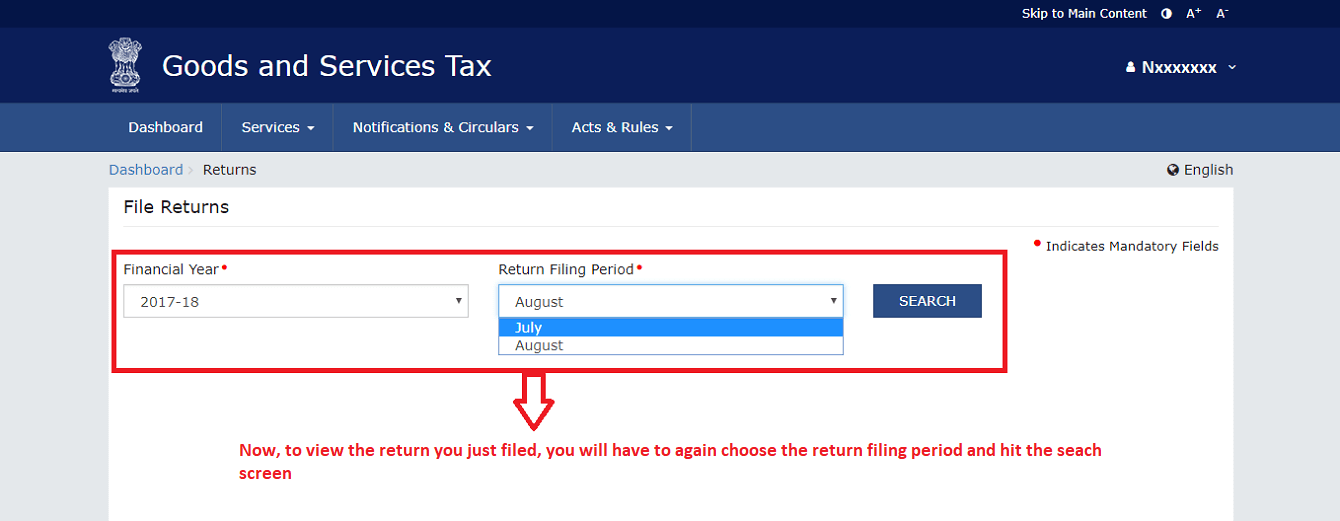
10. Select the month for which you just uploaded the returns, to check your data
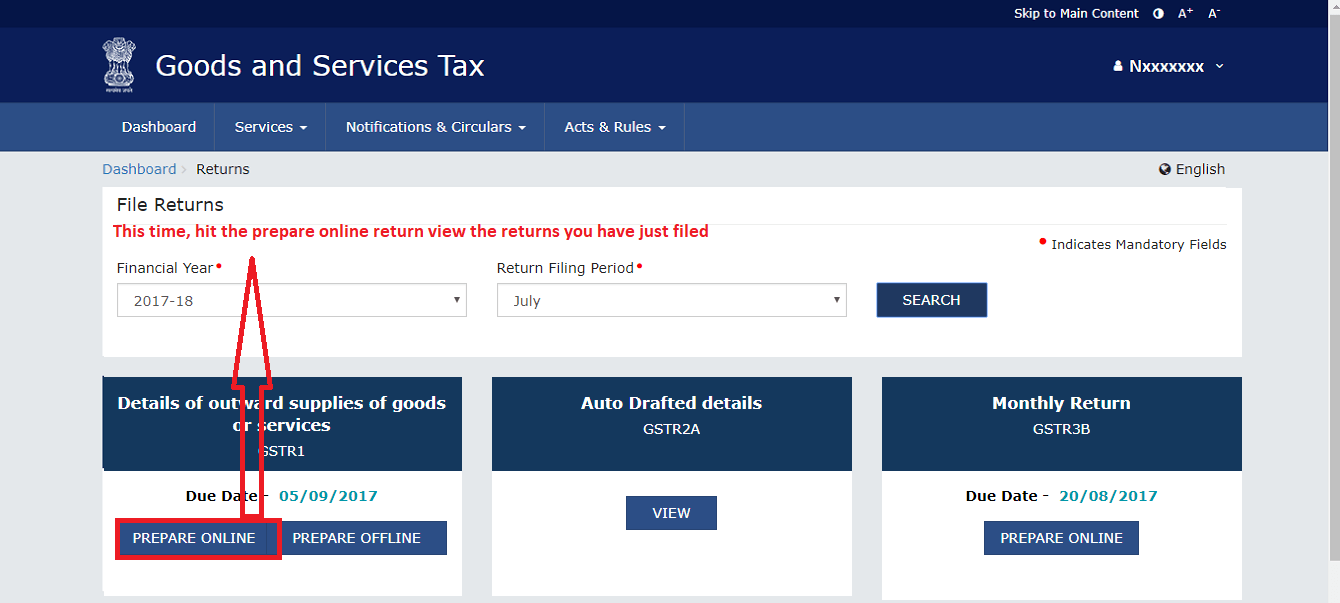
11. To check the data, this time click on “prepare online” button
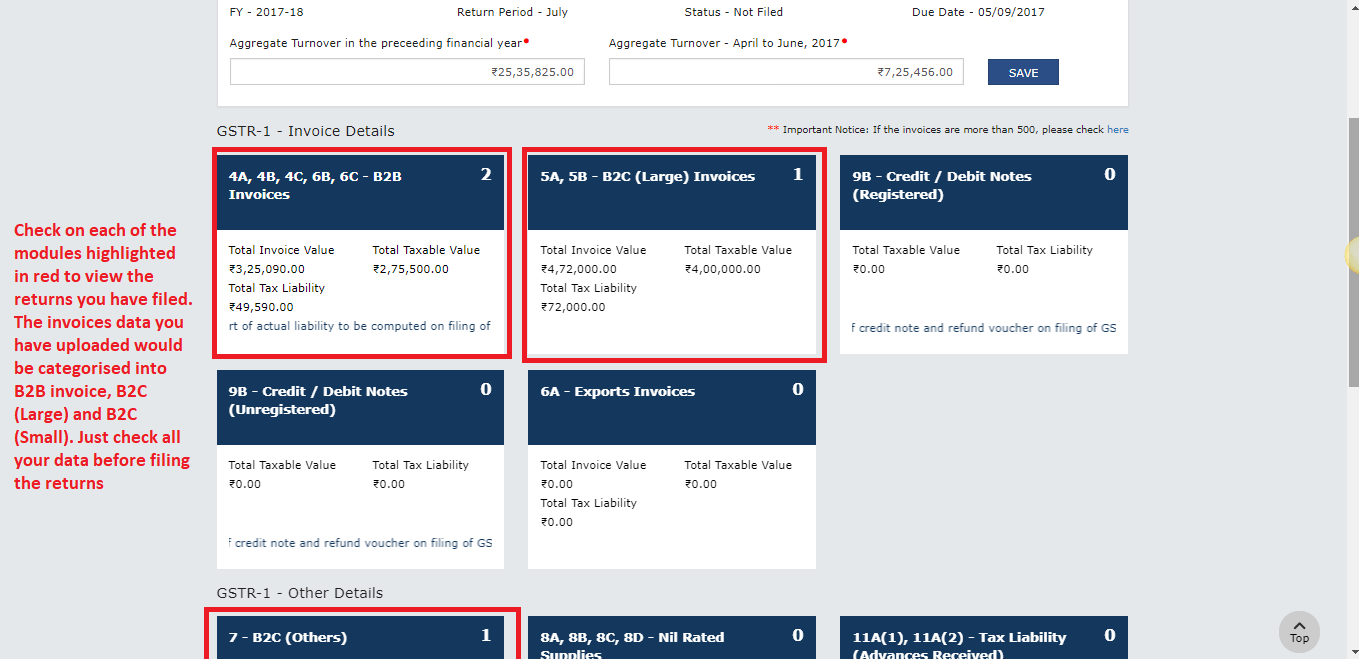
12. Here you can check the returns that you have filed. You can also edit the data you uploaded by clicking on the relevant module

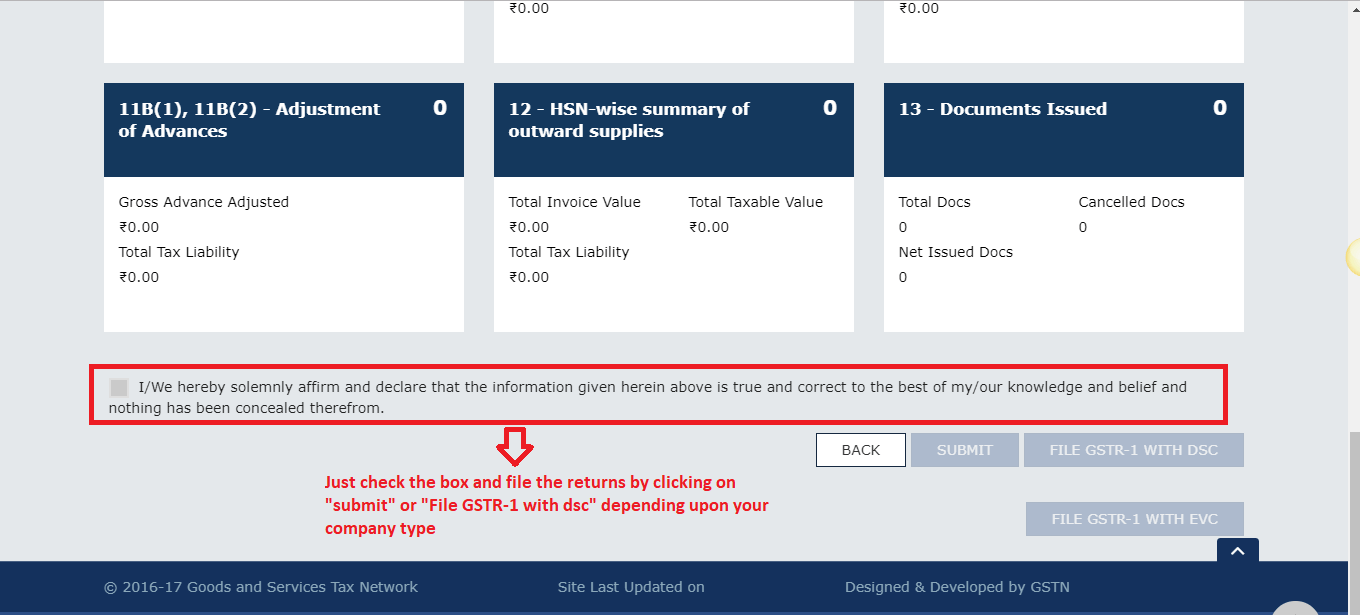
13. If all looks good, just check the box in the end and submit the return

Here is how you can create a GST compliant invoice
Our software is exhaustive and it is an Accounting Software with Inventory management
Click here to view all GST tutorials at one place
2. Visit GST portal . Click on login button.
3. Provide your credentials and login
4. After logging in, click on “return dashboard”
5. Select the month for which you wish to file the return and hit the search button
6. Click on “prepare offline”
7. Upload the file you downloaded from TopNotepad
8. The file may take a few seconds to get processed depending on count of invoice
9. Once the file is successfully processed, click on return (as shown below)
10. Select the month for which you just uploaded the returns, to check your data
11. To check the data, this time click on “prepare online” button
12. Here you can check the returns that you have filed. You can also edit the data you uploaded by clicking on the relevant module
13. If all looks good, just check the box in the end and submit the return
Here is how you can create a GST compliant invoice
Our software is exhaustive and it is an Accounting Software with Inventory management
Click here to view all GST tutorials at one place