Here is how to create a GST compliant invoice
If you are a TopNotepad user, you can create a GST compliant invoice in a few simple steps.
To understand this better, let’s look at an example. Let’s say you are selling plywood, which attracts 28% GST to a furniture manufacturer. Here is how you go about creating an invoice for your client.
In case you have not updated your own GSTIN number, please do so by following these simple steps.
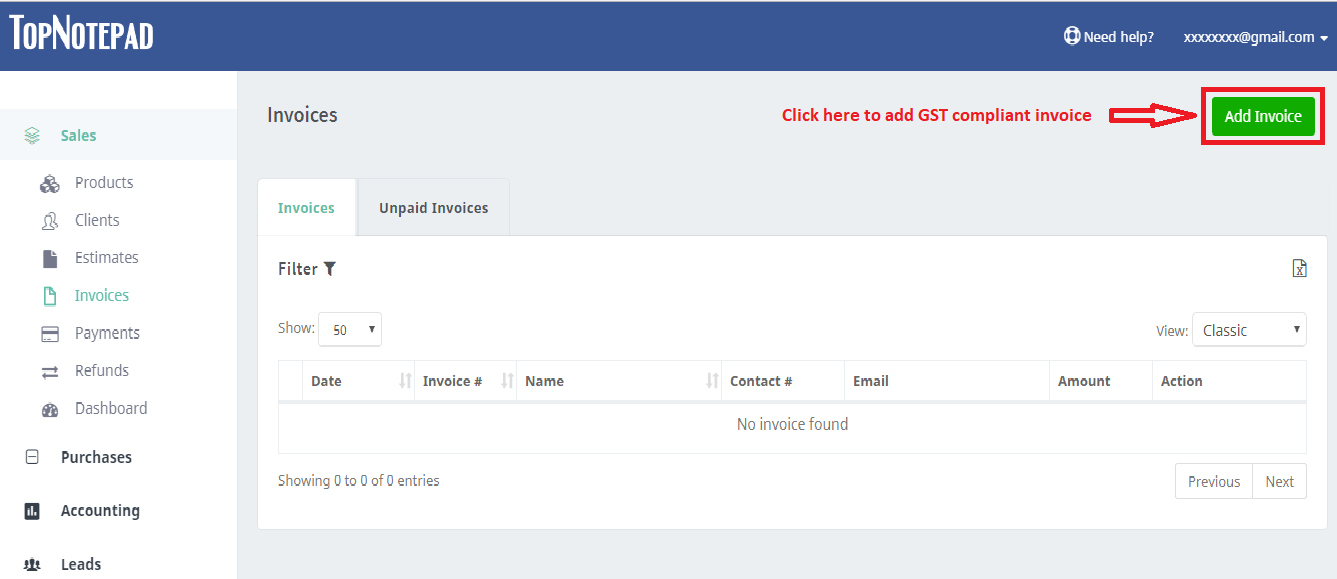
Step 1: Click on the add invoice button as shown in the screenshot below.

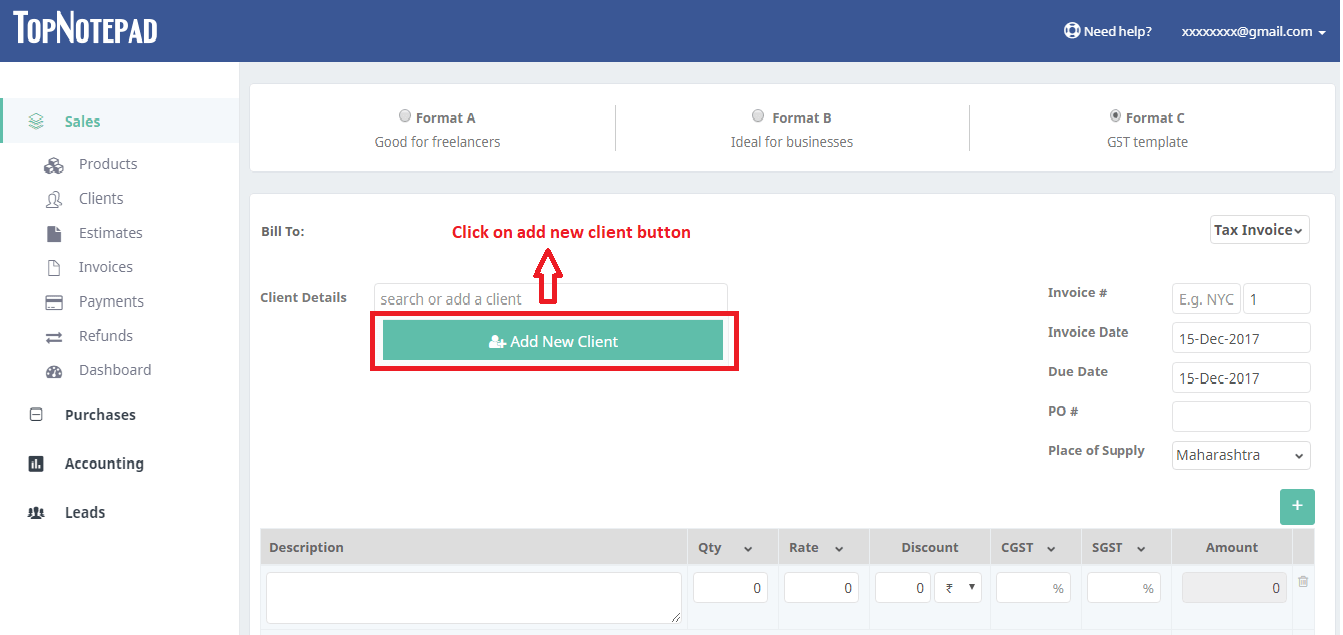
Step 2: Click on the add client button or select from your existing client list.

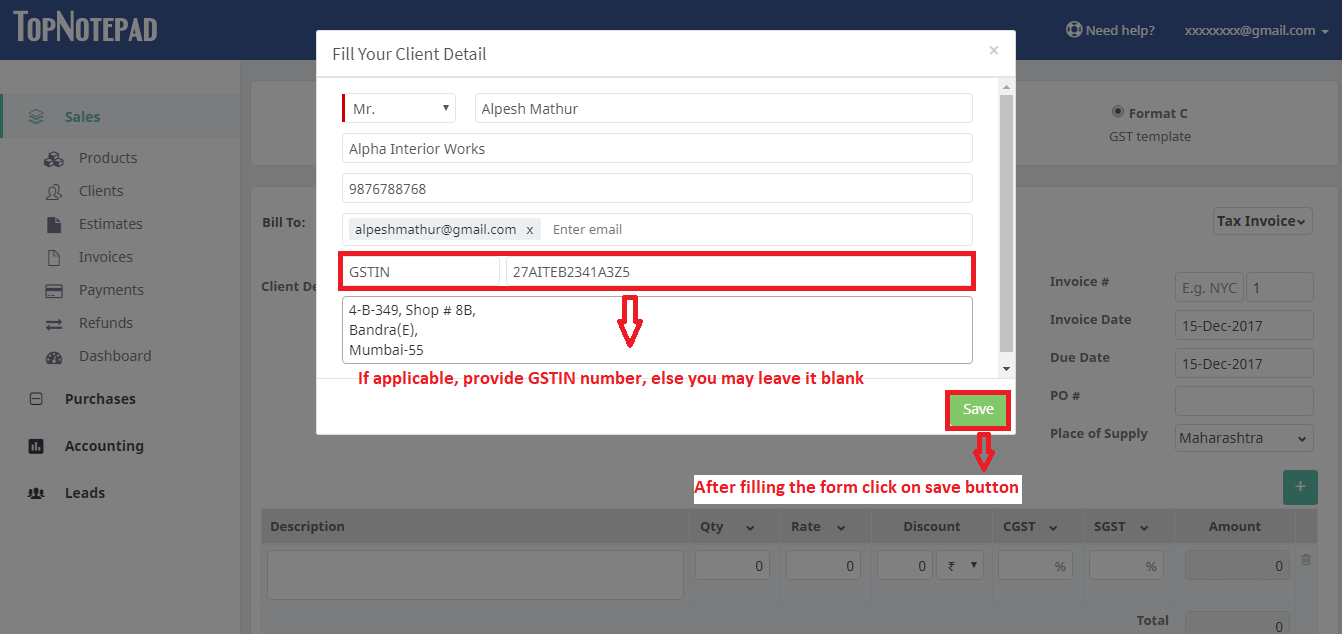
Step 3: Please provide all the details like client name, client GSTN number (if applicable), address etc.,.

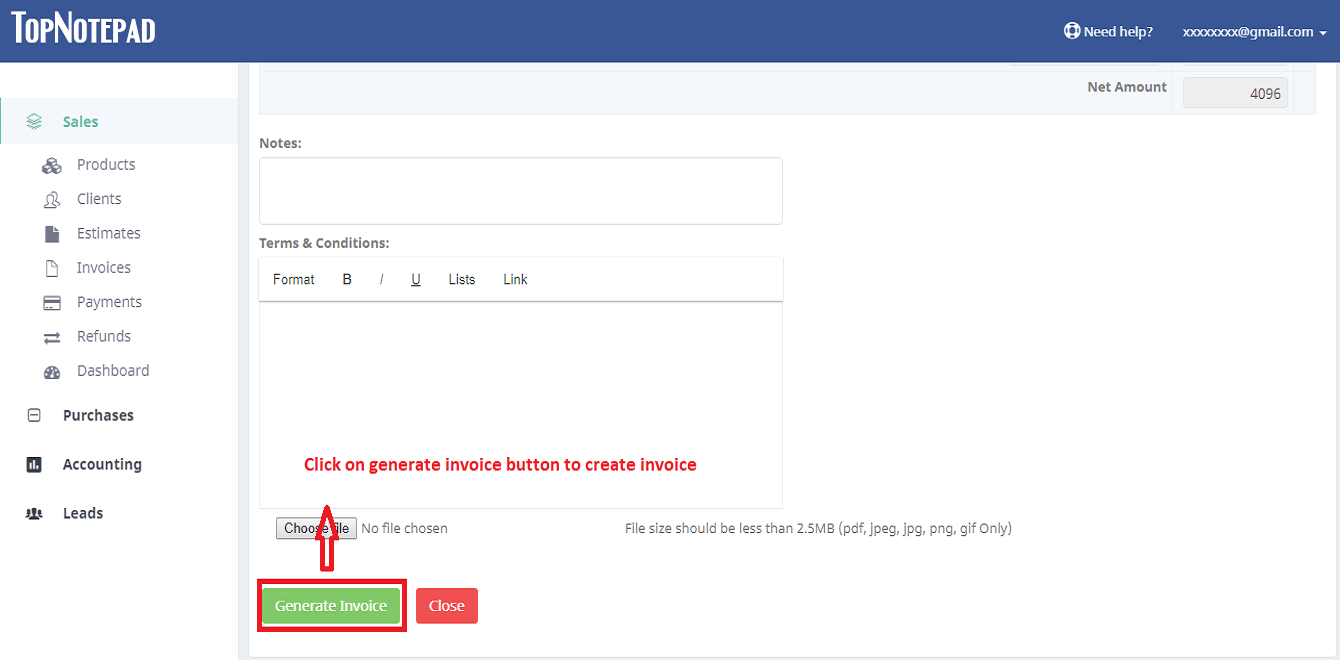
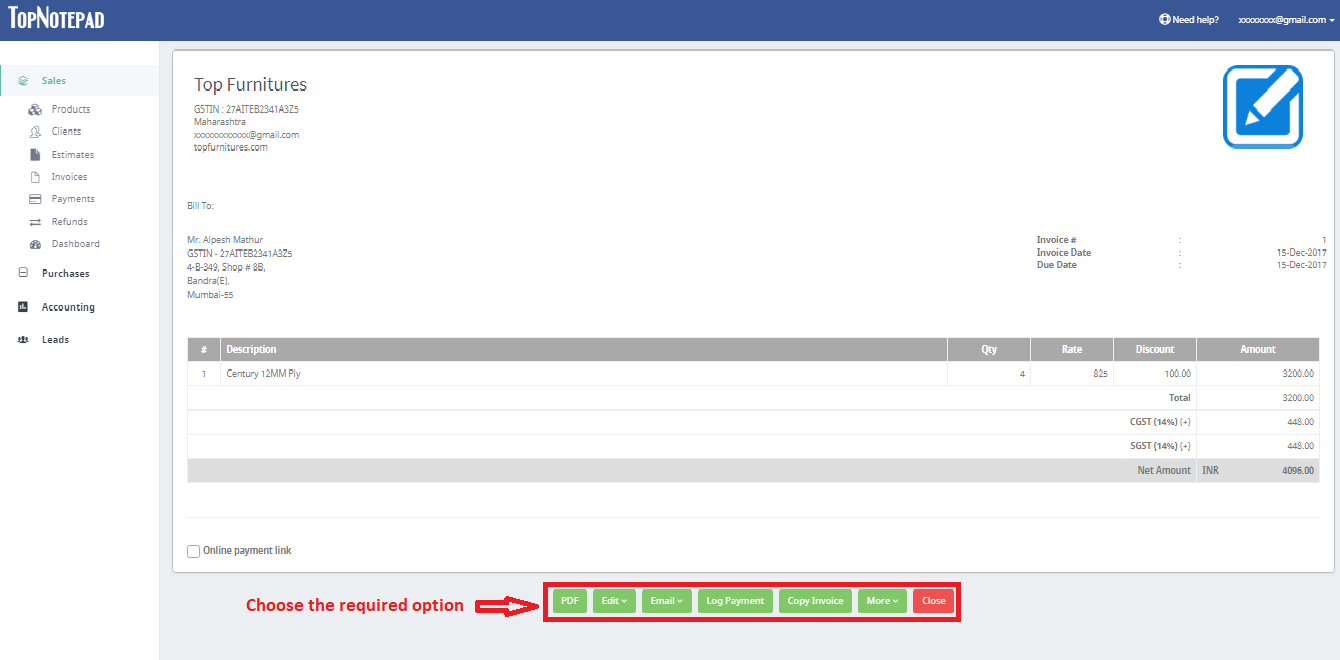
Step 4: Fill out invoice related information as shown in the screen shots below.

Step 5: Click on ‘generate invoice’ button to create GST compliant invoice.

Next up: learn how to file gst returns on your own
Click here to view all GST tutorials at one place
To understand this better, let’s look at an example. Let’s say you are selling plywood, which attracts 28% GST to a furniture manufacturer. Here is how you go about creating an invoice for your client.
In case you have not updated your own GSTIN number, please do so by following these simple steps.
Step 1: Click on the add invoice button as shown in the screenshot below.
Step 3: Please provide all the details like client name, client GSTN number (if applicable), address etc.,.
Step 4: Fill out invoice related information as shown in the screen shots below.

Next up: learn how to file gst returns on your own
Click here to view all GST tutorials at one place